How to Customise the Client Dashboard
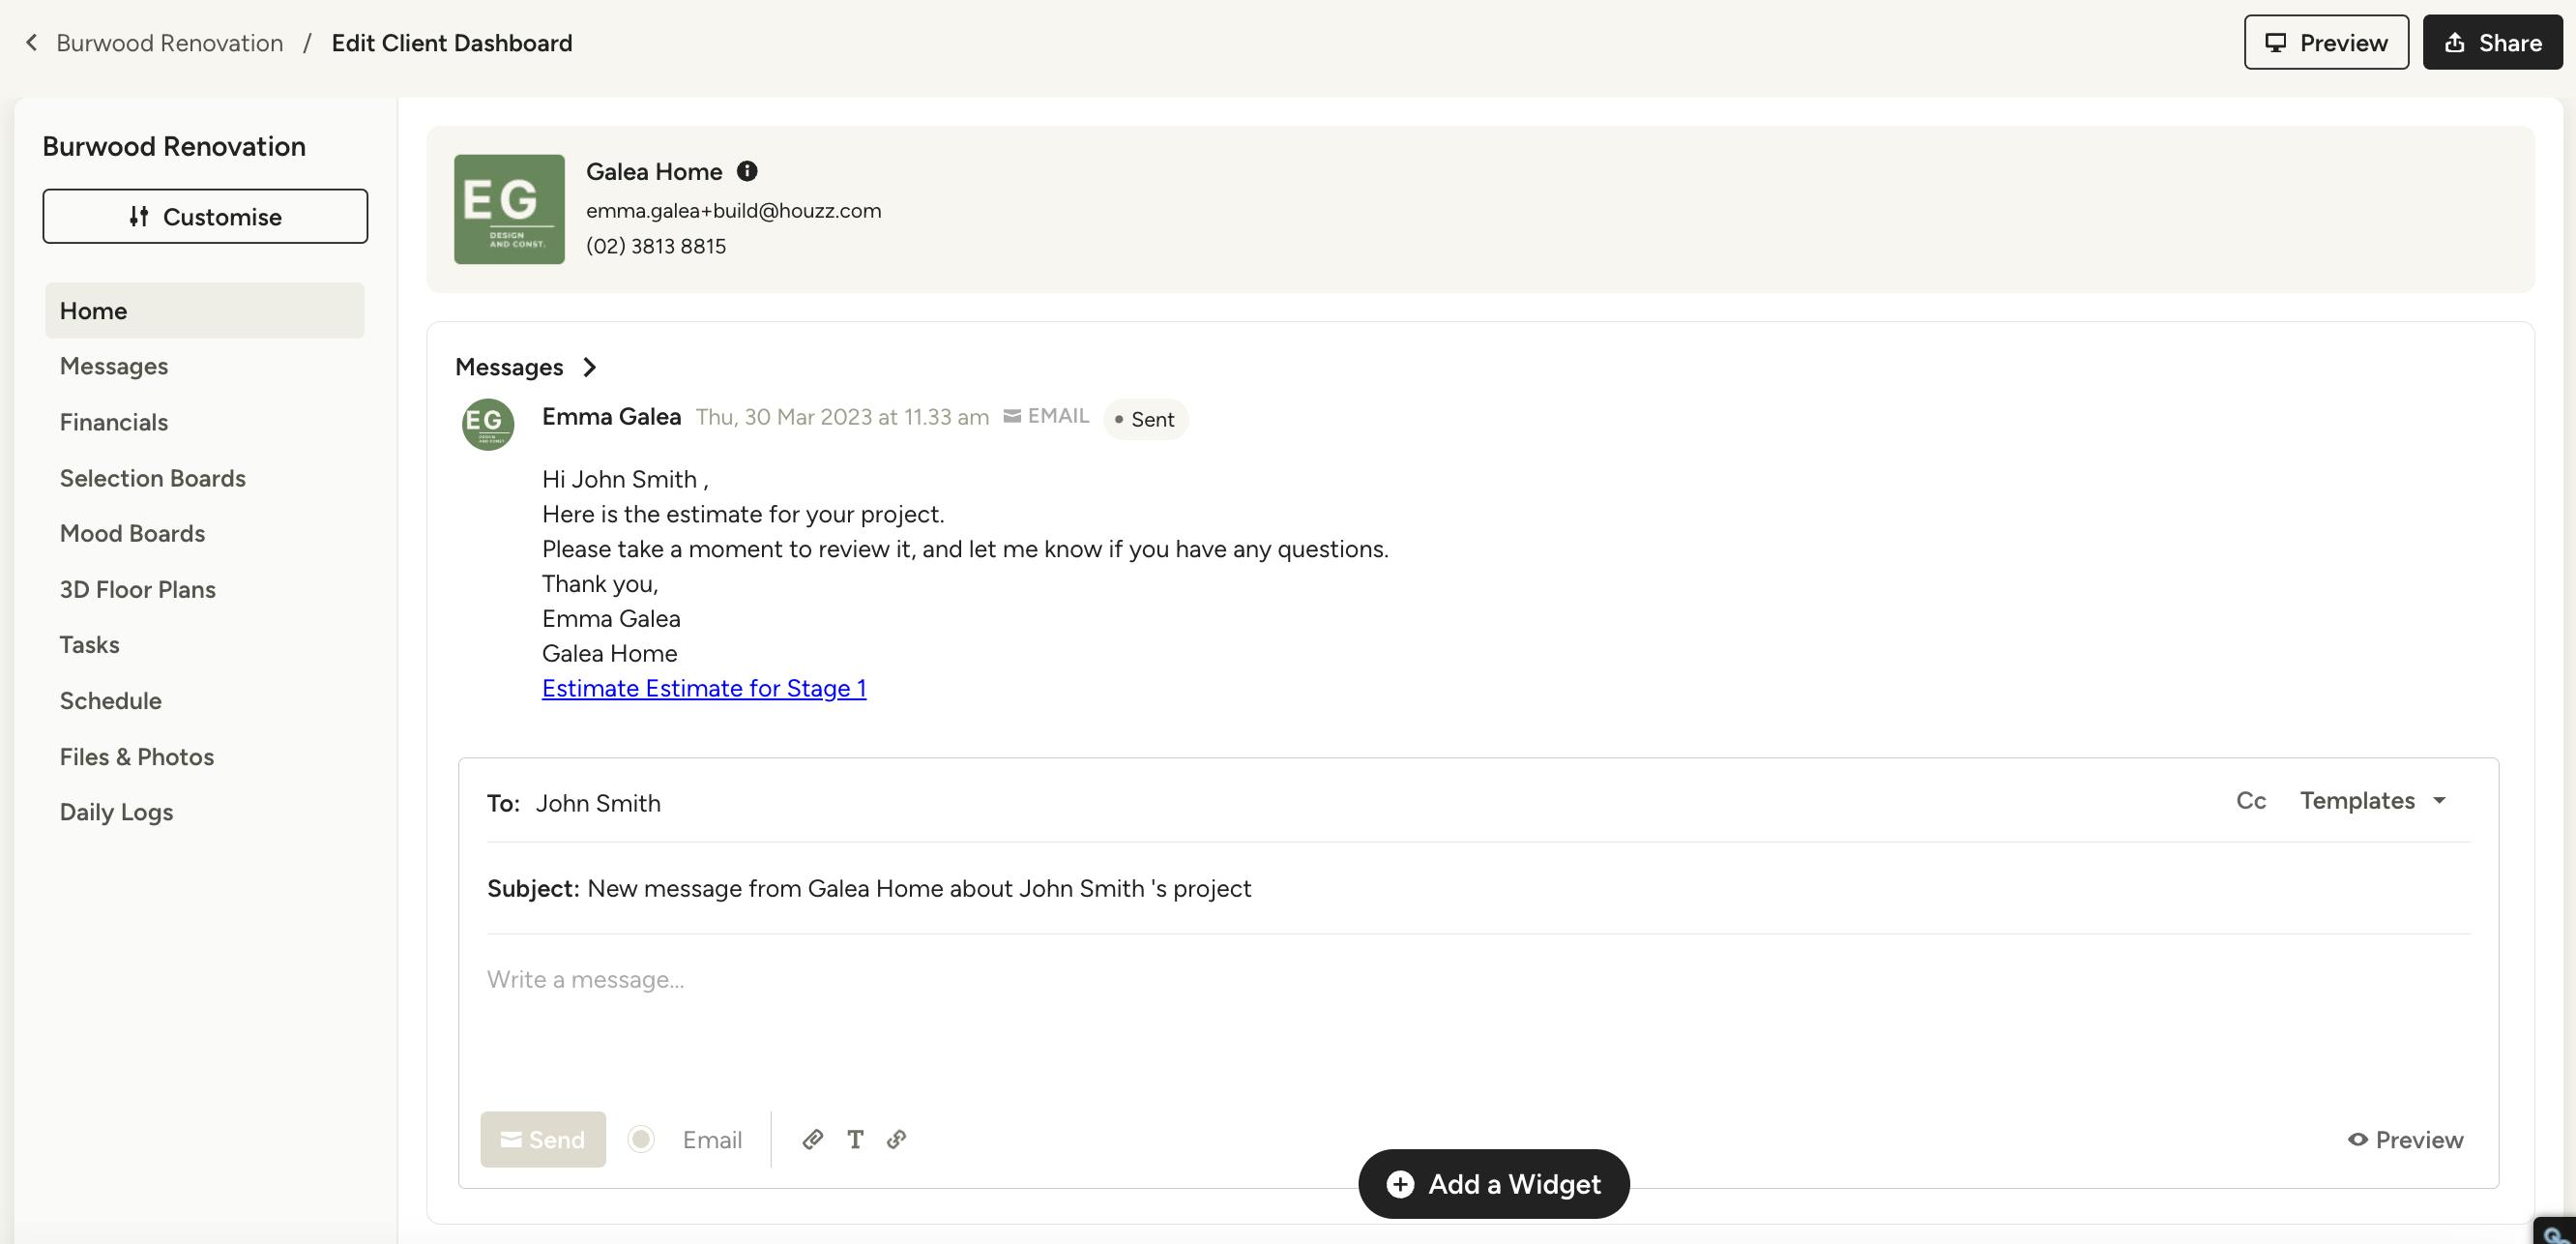
The Client Dashboard in Houzz Pro is an easy way to share your project vision and progress with your clients.
When you share the Client Dashboard, your clients can see everything in one place, including financial documents, schedule, files & photos, messages, 3D floor plans, project budget and more. It gives them full visibility into the project and ensures they feel included and supported in the process.
As the pro, you can fully customise the information included within the Client Dashboard to ensure you represent your business in the way you want. You can add relevant business information, videos, a cover photo, widgets and customise client access (cover photo and video widget are for Custom packages only).
This article will review all the customisation options available to you. If you would like to learn more about client access to the dashboard, read How to Preview and Share the Client Dashboard.
Customise Company Header
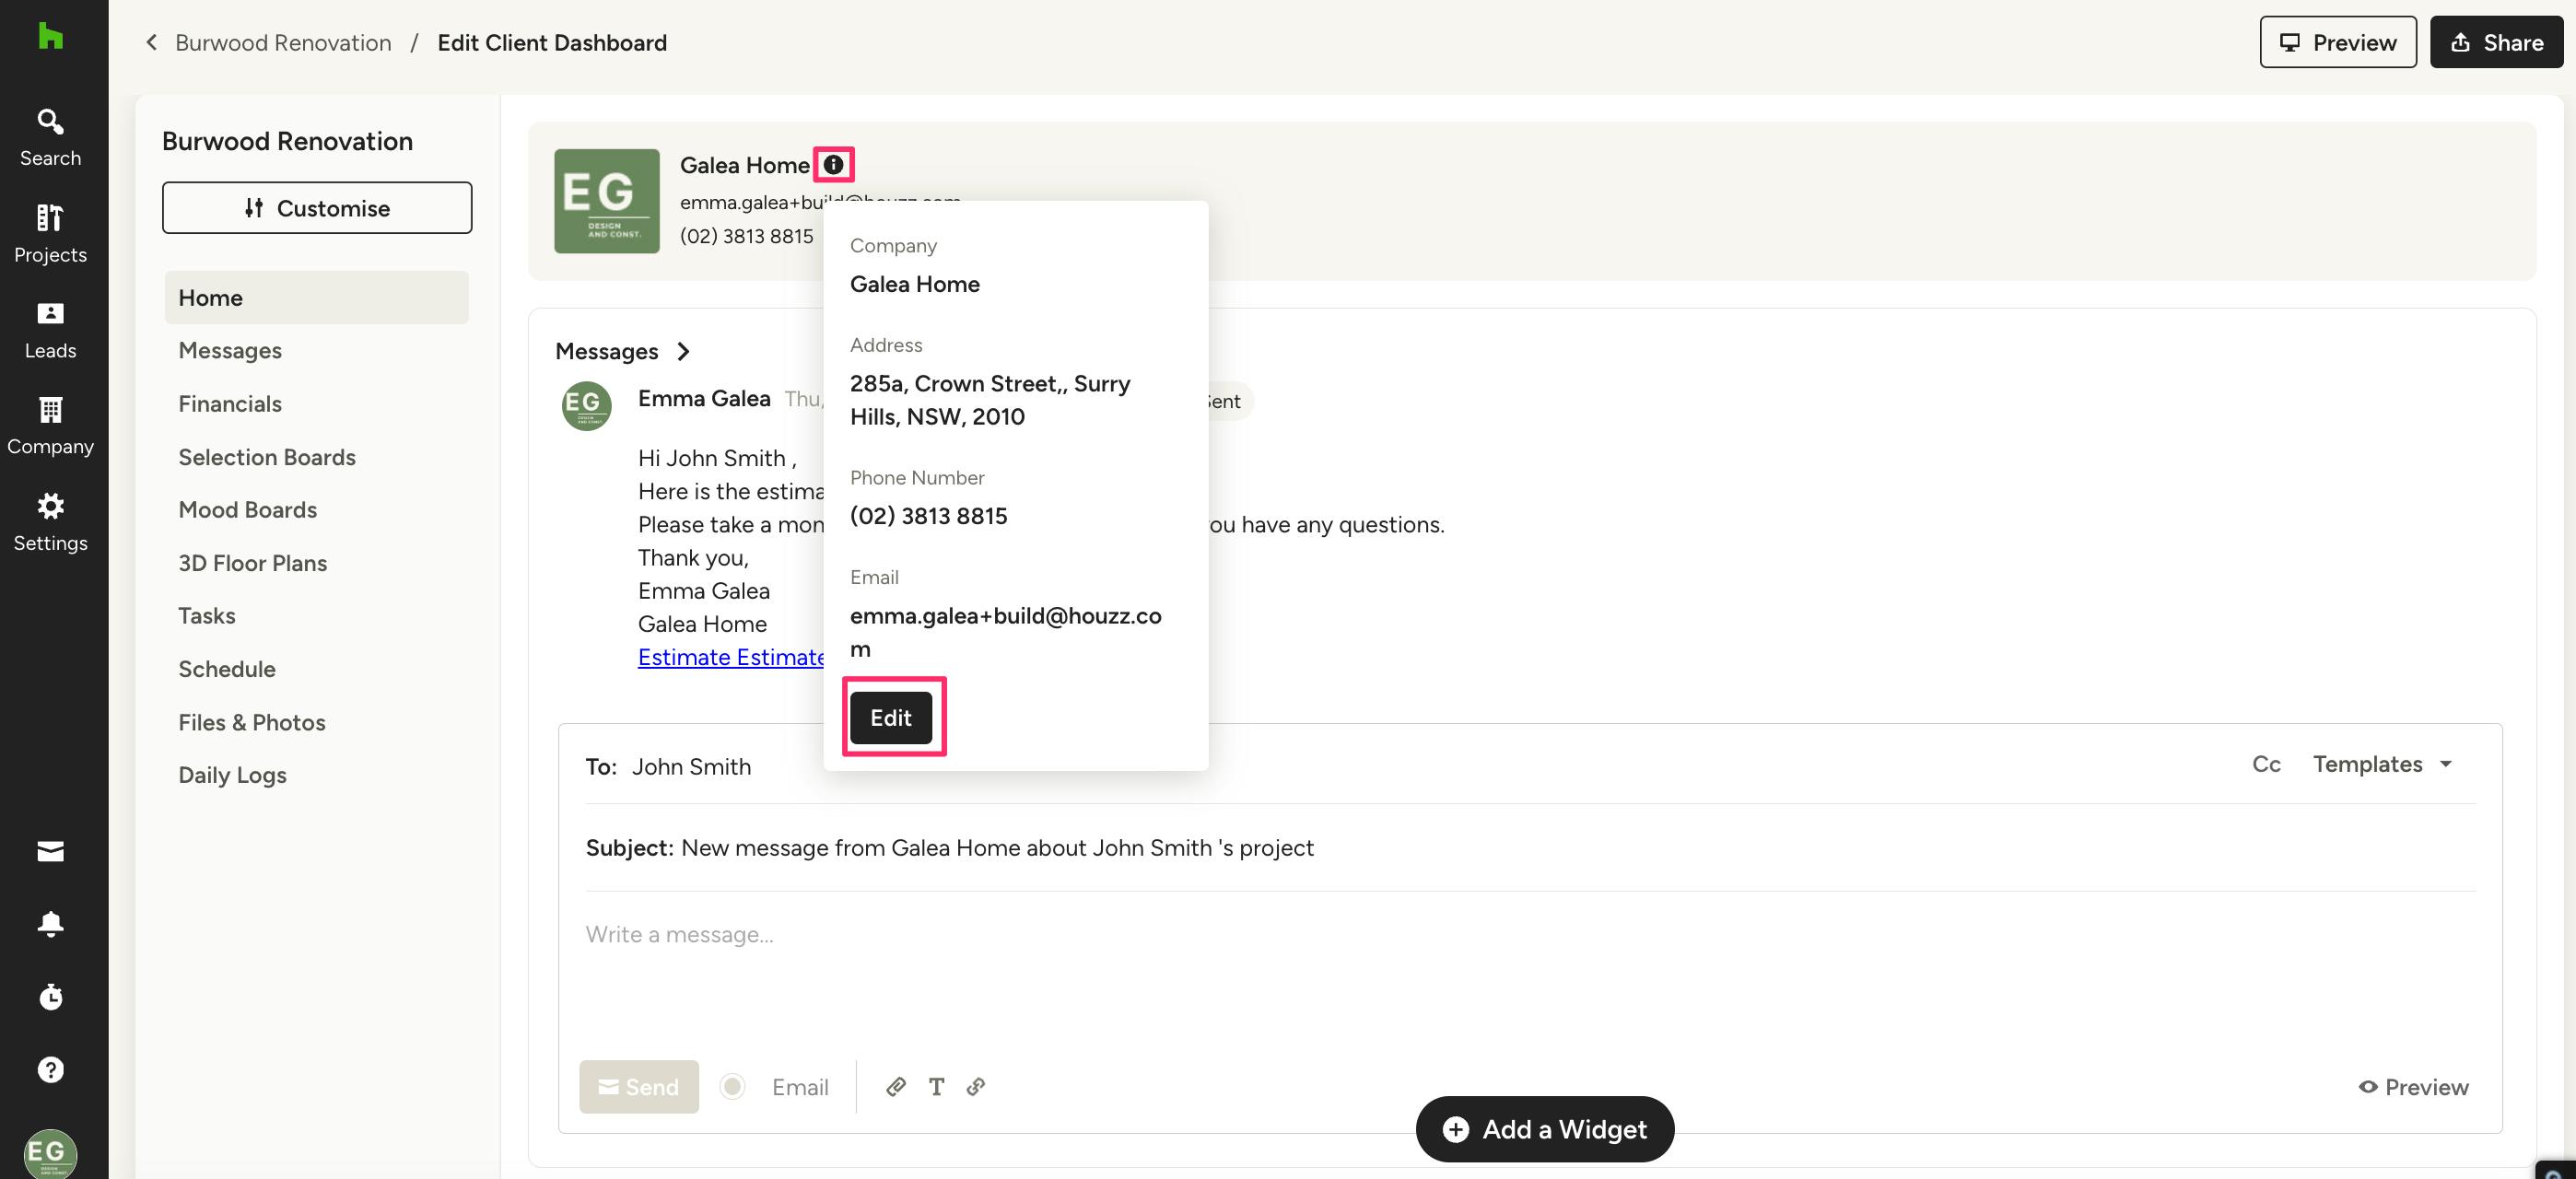
The Client Dashboard includes a header at the top of the page that introduces you as a business. It includes your business name, contact information, logo and cover image — all of which can be customised to suit your needs.
If you would like to adjust the company information that's shown on the dashboard, click on the i icon to the right of your company name.
Here, you can click Edit to adjust what company information is shown on the dashboard.
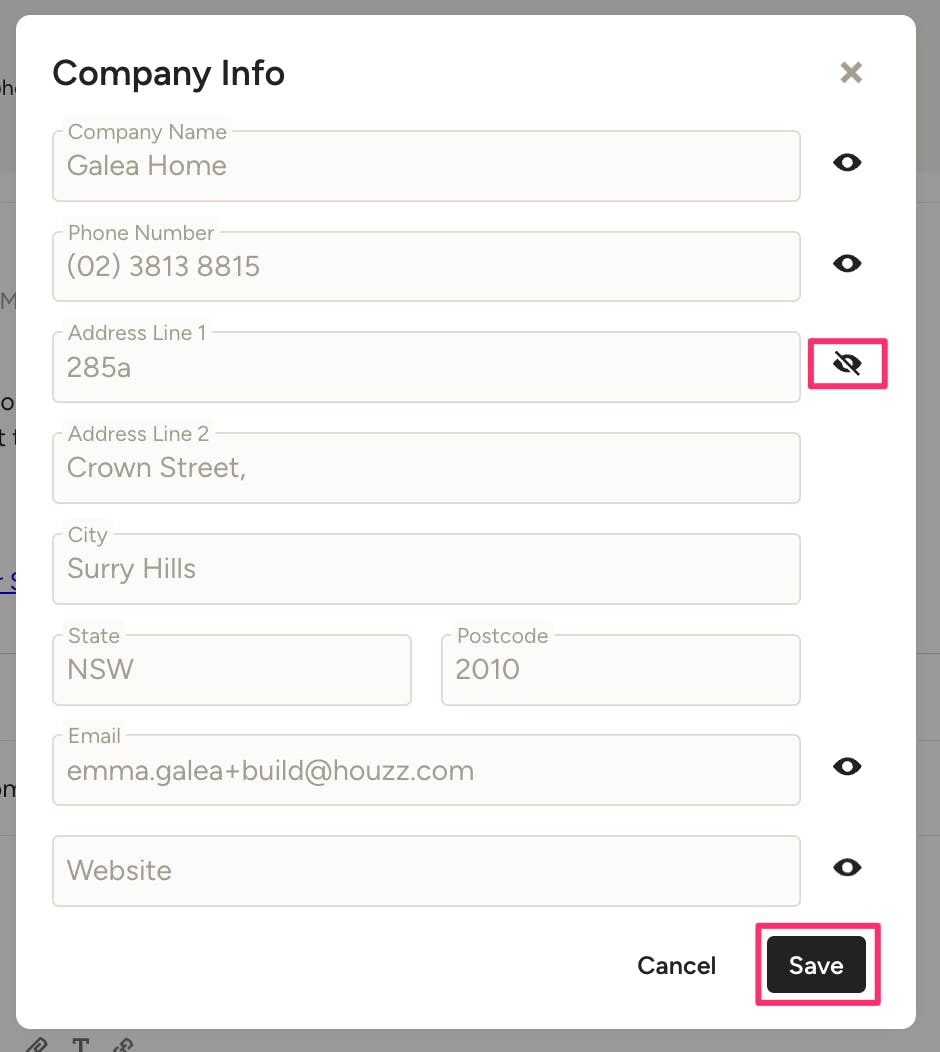
Within Edit mode, select the Eye icon to hide certain aspects of your company information. For example, if the eye is crossed out next to address, your address will not appear on the Client Dashboard.
If you want to make changes to the company information listed here, you will need to adjust on an account level. You are not able to edit here.
Be sure to click Save once complete.
Customise Dashboard Menu
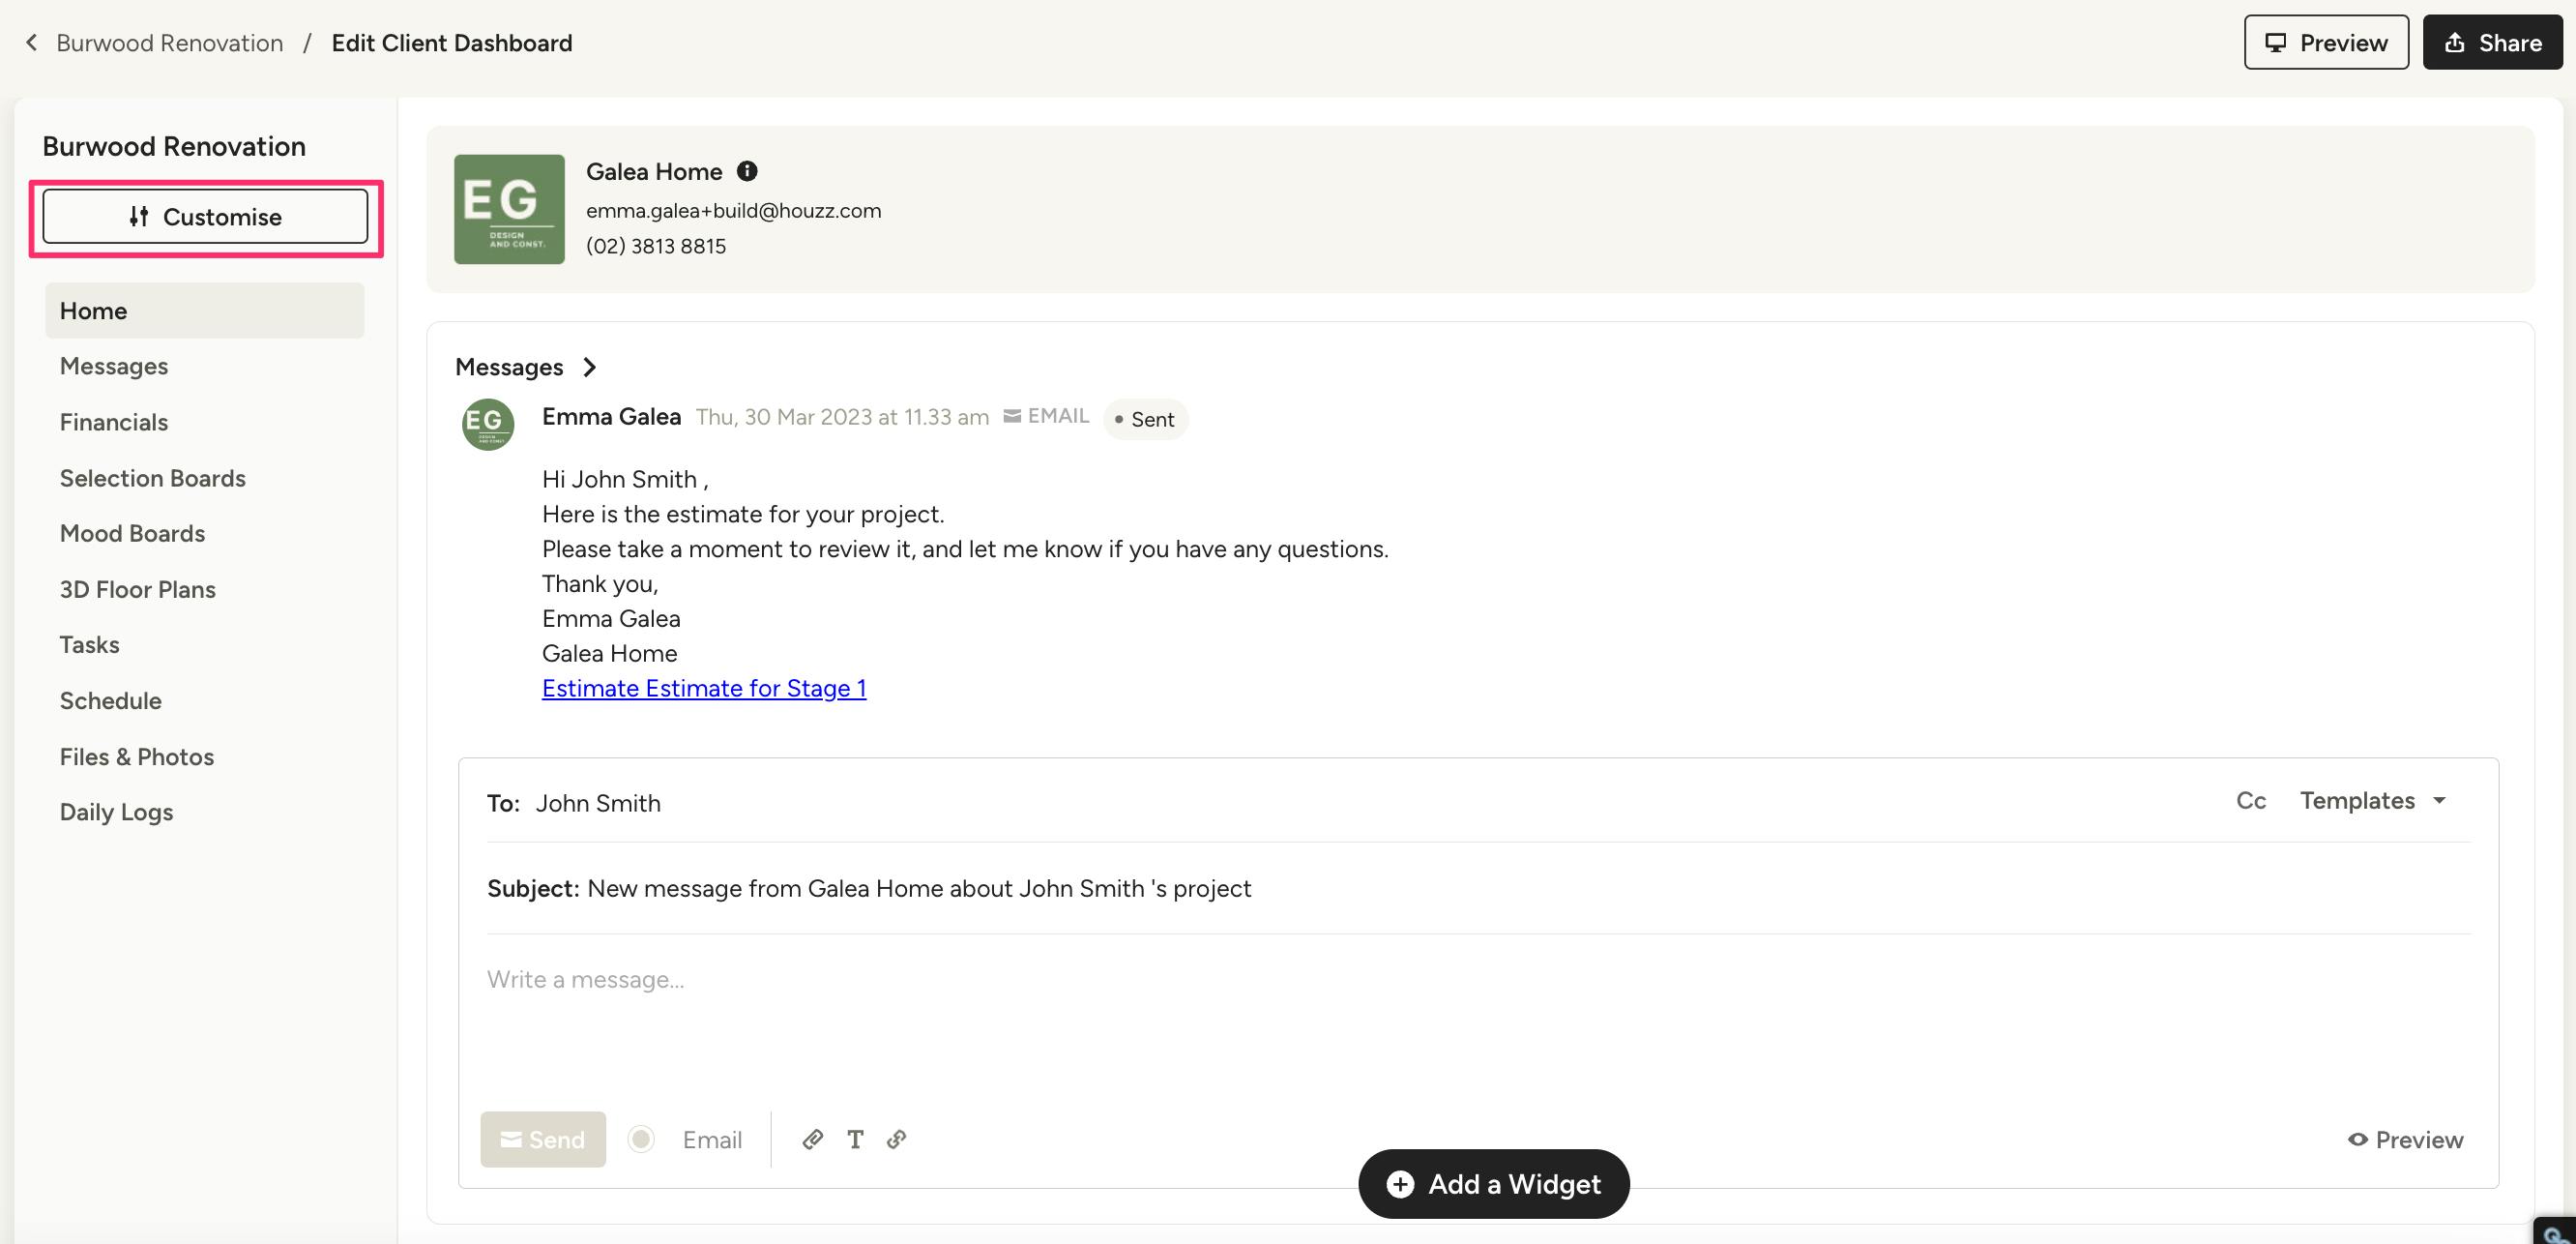
The Client Dashboard includes a left-hand menu that organizes all project documentation by Houzz Pro feature. The list is fully customisable, but it can include Messages, Project Updates, Claims, Contracts, Financials, Budget, Online Payment Records, Selection Boards, Mood Boards, 3D Floor Plans, Tasks & Punchlist, Schedule, Files & Photos, and Daily Logs.
You can use the Customise button to adjust which sections appear for your client.
Please Note: While you can toggle on or off a section, that does not mean access has been shared with your client. The section will be empty until you give the client access to a specific document or feature. To learn more about this process, read How to Preview and Share the Client Dashboard.
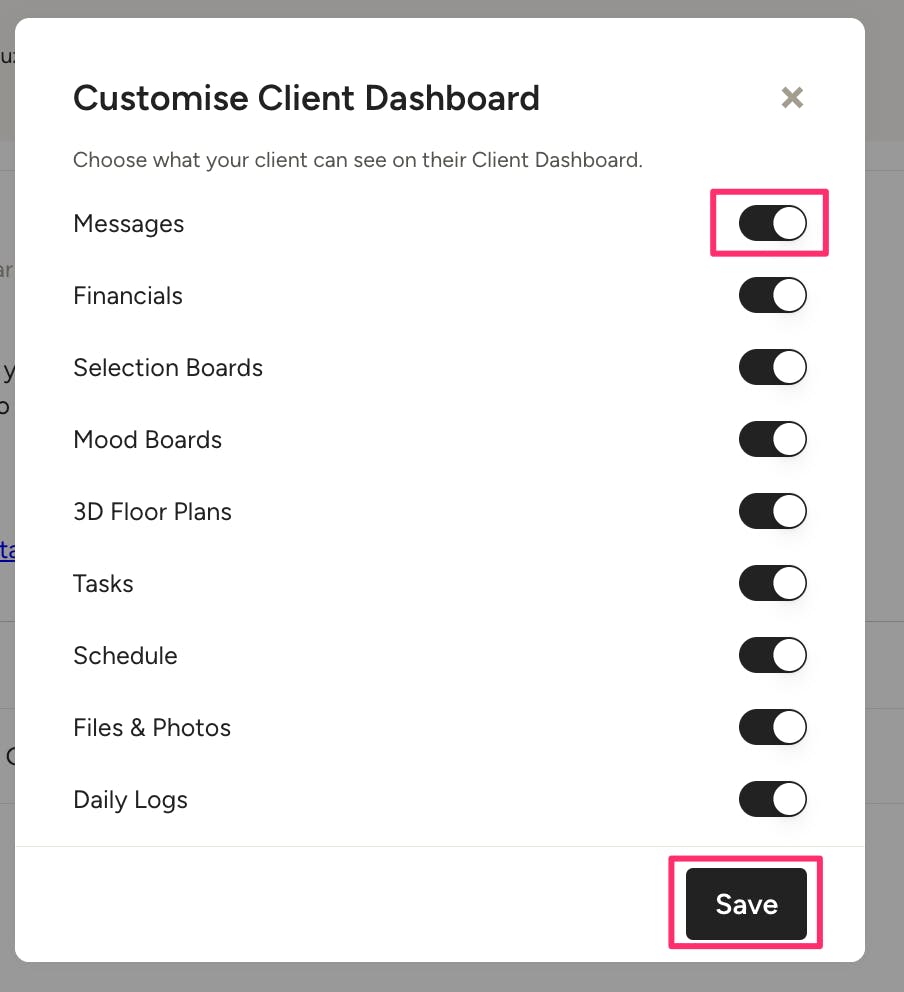
When you select Customise, a new screen will appear. Turn on and off the toggle to adjust the options available.
If you turn off the toggle, that section will disappear from the left menu, even if you have shared access with the client.
If you turn on the toggle, that section will appear in the left menu. If you have shared access with the client, files will appear. If you have not shared access with the client, the section will be empty.
Once complete, select Save.
Customise Widgets
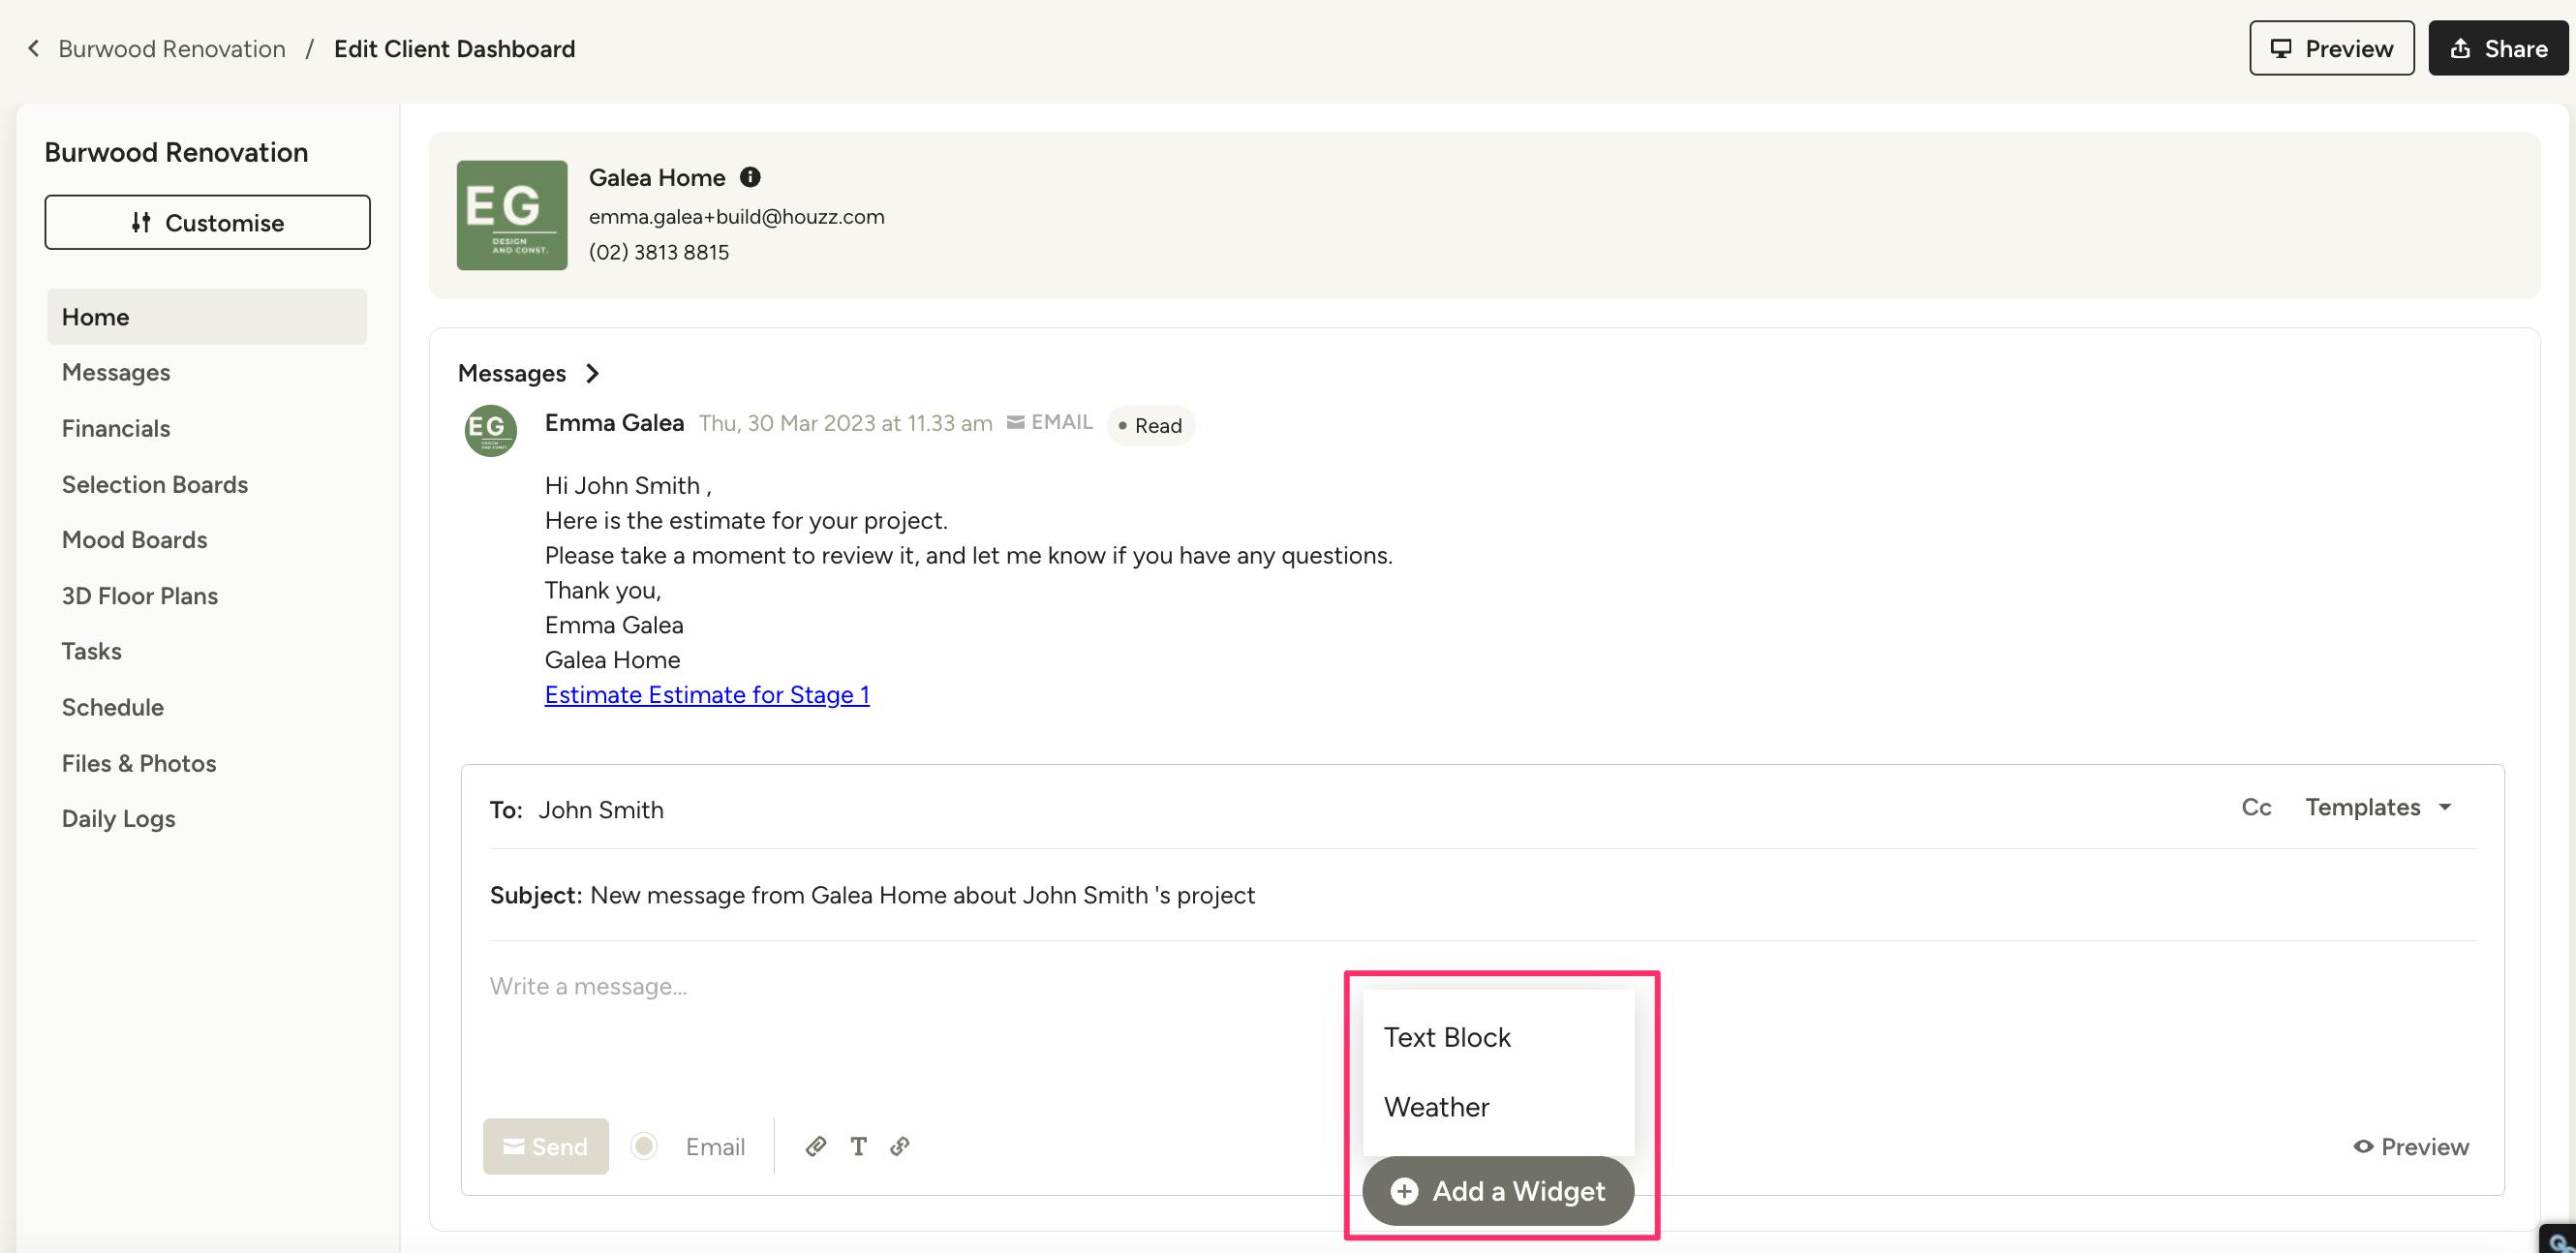
The Client Dashboard includes the option to add custom widgets for enhance the client view, including Text Block and Weather.
Once selected, the widgets will appear in the main section of the dashboard, along with the relevant features you have shared with your client.
To add a widget, click the Add a Widget button at the bottom of your screen, then select the relevant option. Please Note: You can include one text block, and/or one weather widget, but you will need to add them one at a time.
Text Block
If you select Text Block, you can enter simple text into the dashboard. This is a great place to welcome your client, provide details about your company, or update with project-specific information.
Weather
If you select Weather, you can showcase the weather report in your project location — just add the location postcode to update with local information. This helps the client stay informed about any weather conditions that might delay or impact your project schedule.
Once added, the sections will appear at the top of your Client Dashboard.
Preview and Share the Client Dashboard
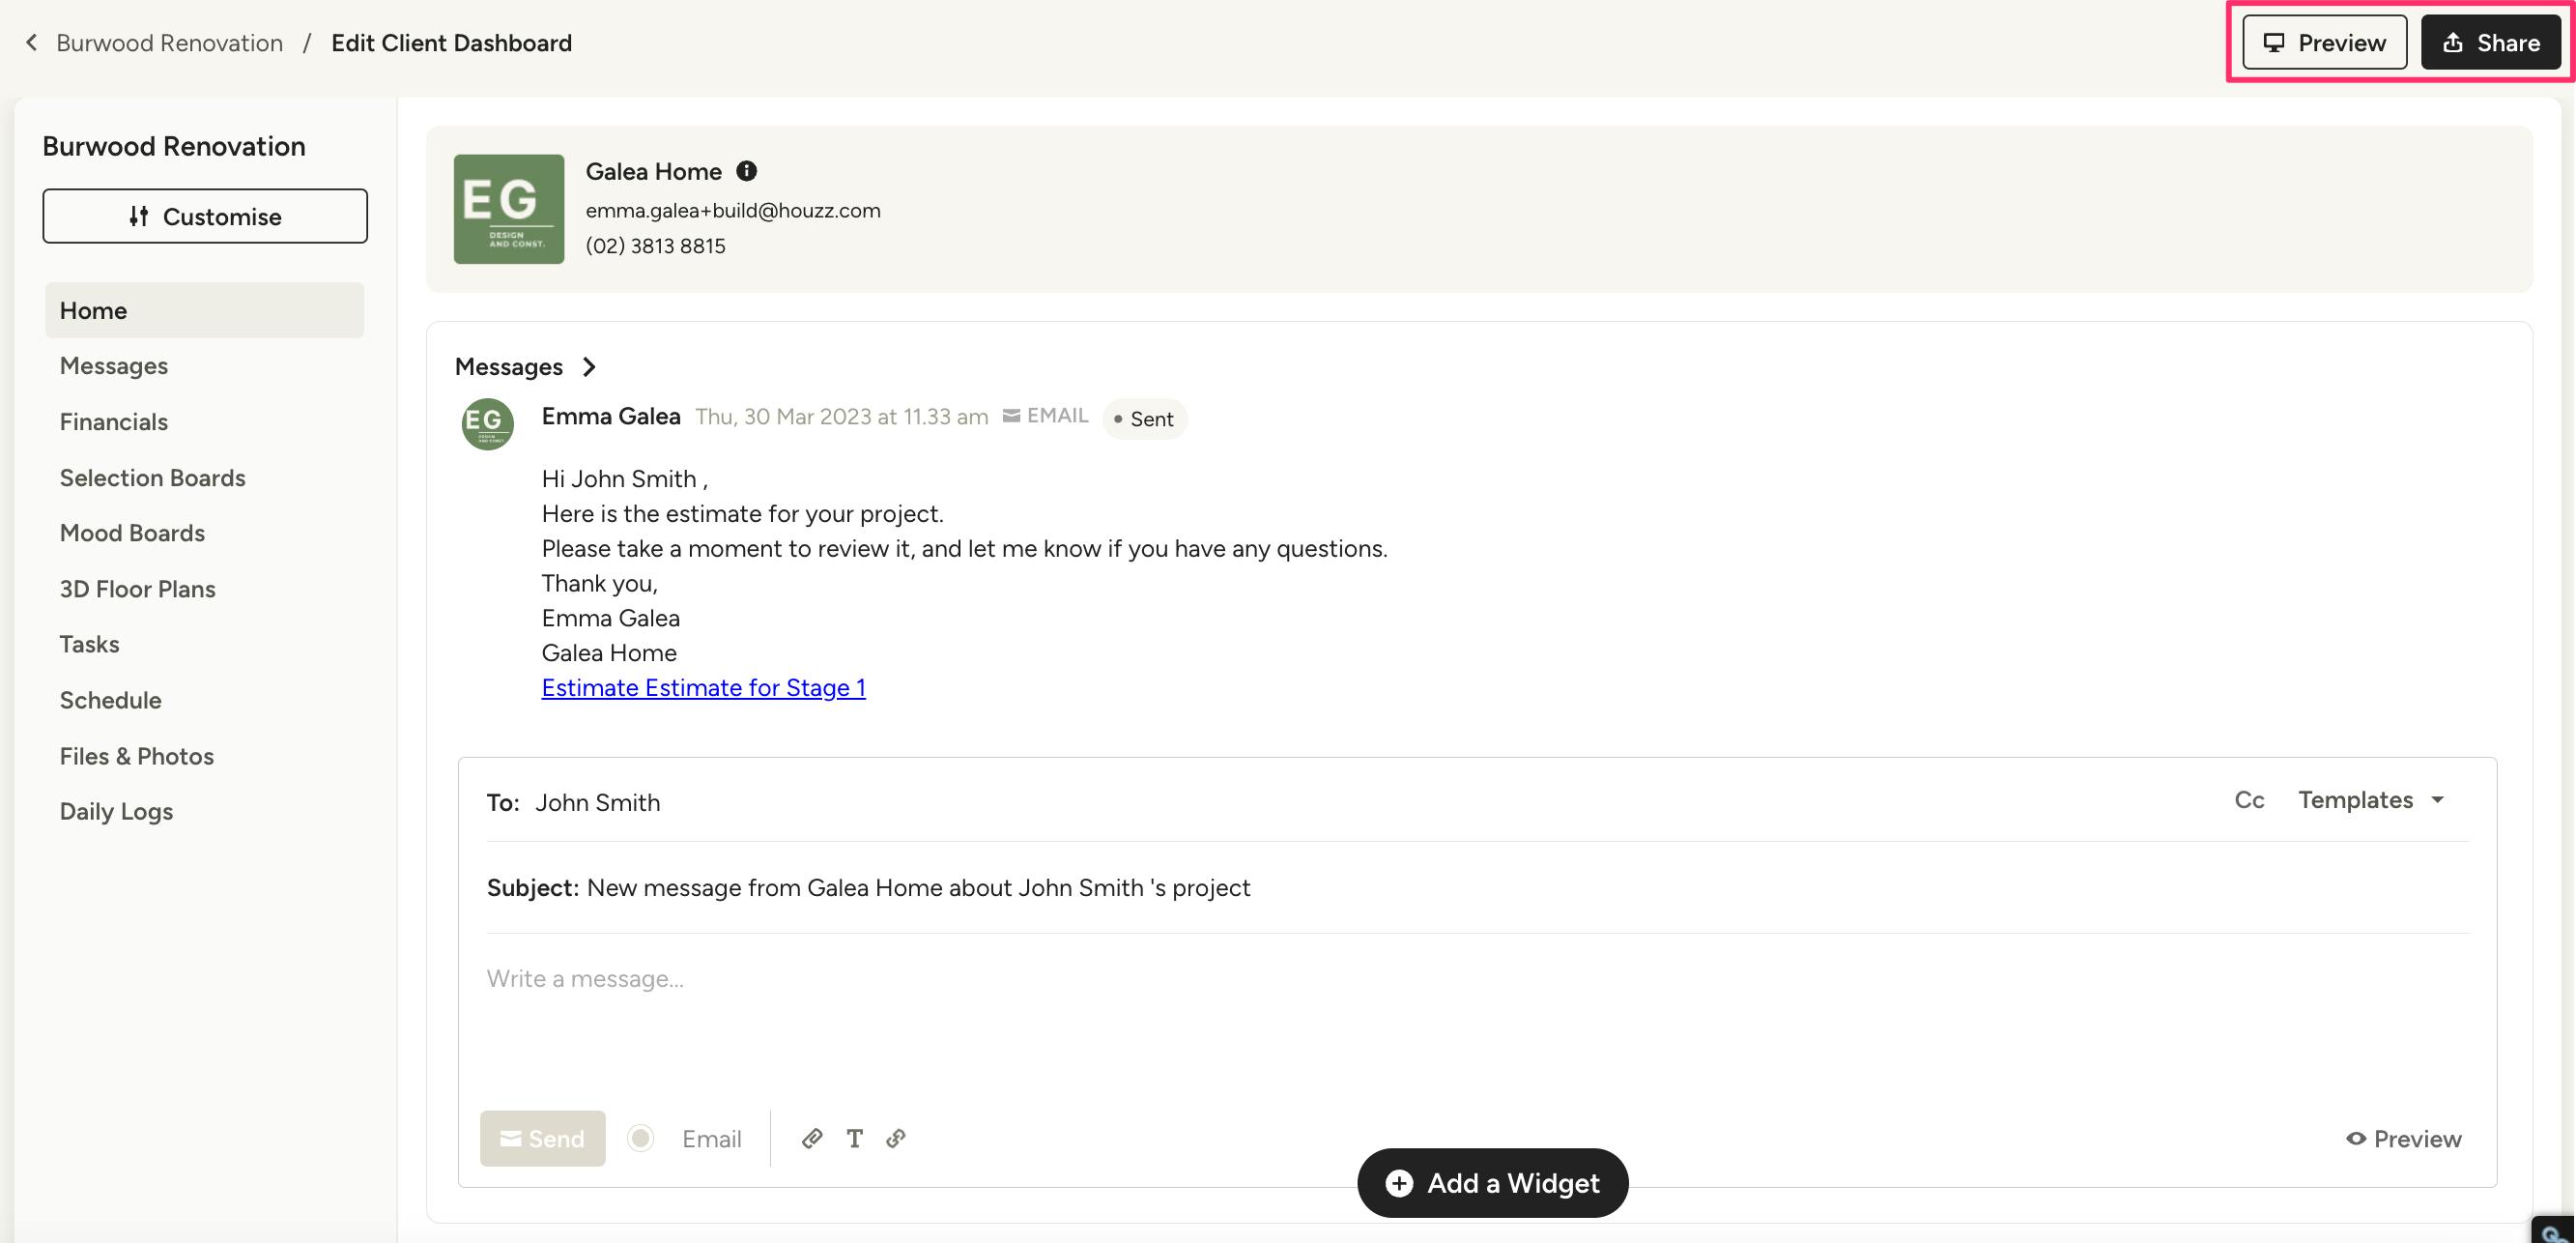
When your Client Dashboard is fully customised, click Preview at the top of your dashboard to view it from the client perspective.
If everything looks good, you are ready to share with your client. To learn more about sharing, read How to Preview and Share the Client Dashboard.