How to Use Company Files
Company files gives you a centralised library for business-wide documents that live outside any single project. Store and organise important company resources — like licenses, insurance certificates, brand assets, onboarding materials, internal guidelines, or team documents — and make them easily accessible across your Houzz Pro account for your entire team.
Instead of re-uploading the same files every time you start a new job, upload them once and access them whenever needed. Company files works just like files within projects/leads today, allowing you to organise documents into folders, preview files, and edit or manage individual files all in one place.
Please Note: By default, any new team member added with the Super Admin, Admin, Field Crew, or Design Team roles will have access to all company files. You can manage and update Company File permissions in the team member's permissions page and revoke access at any time if needed. Read more about adjusting permissions here.
Access Company Files
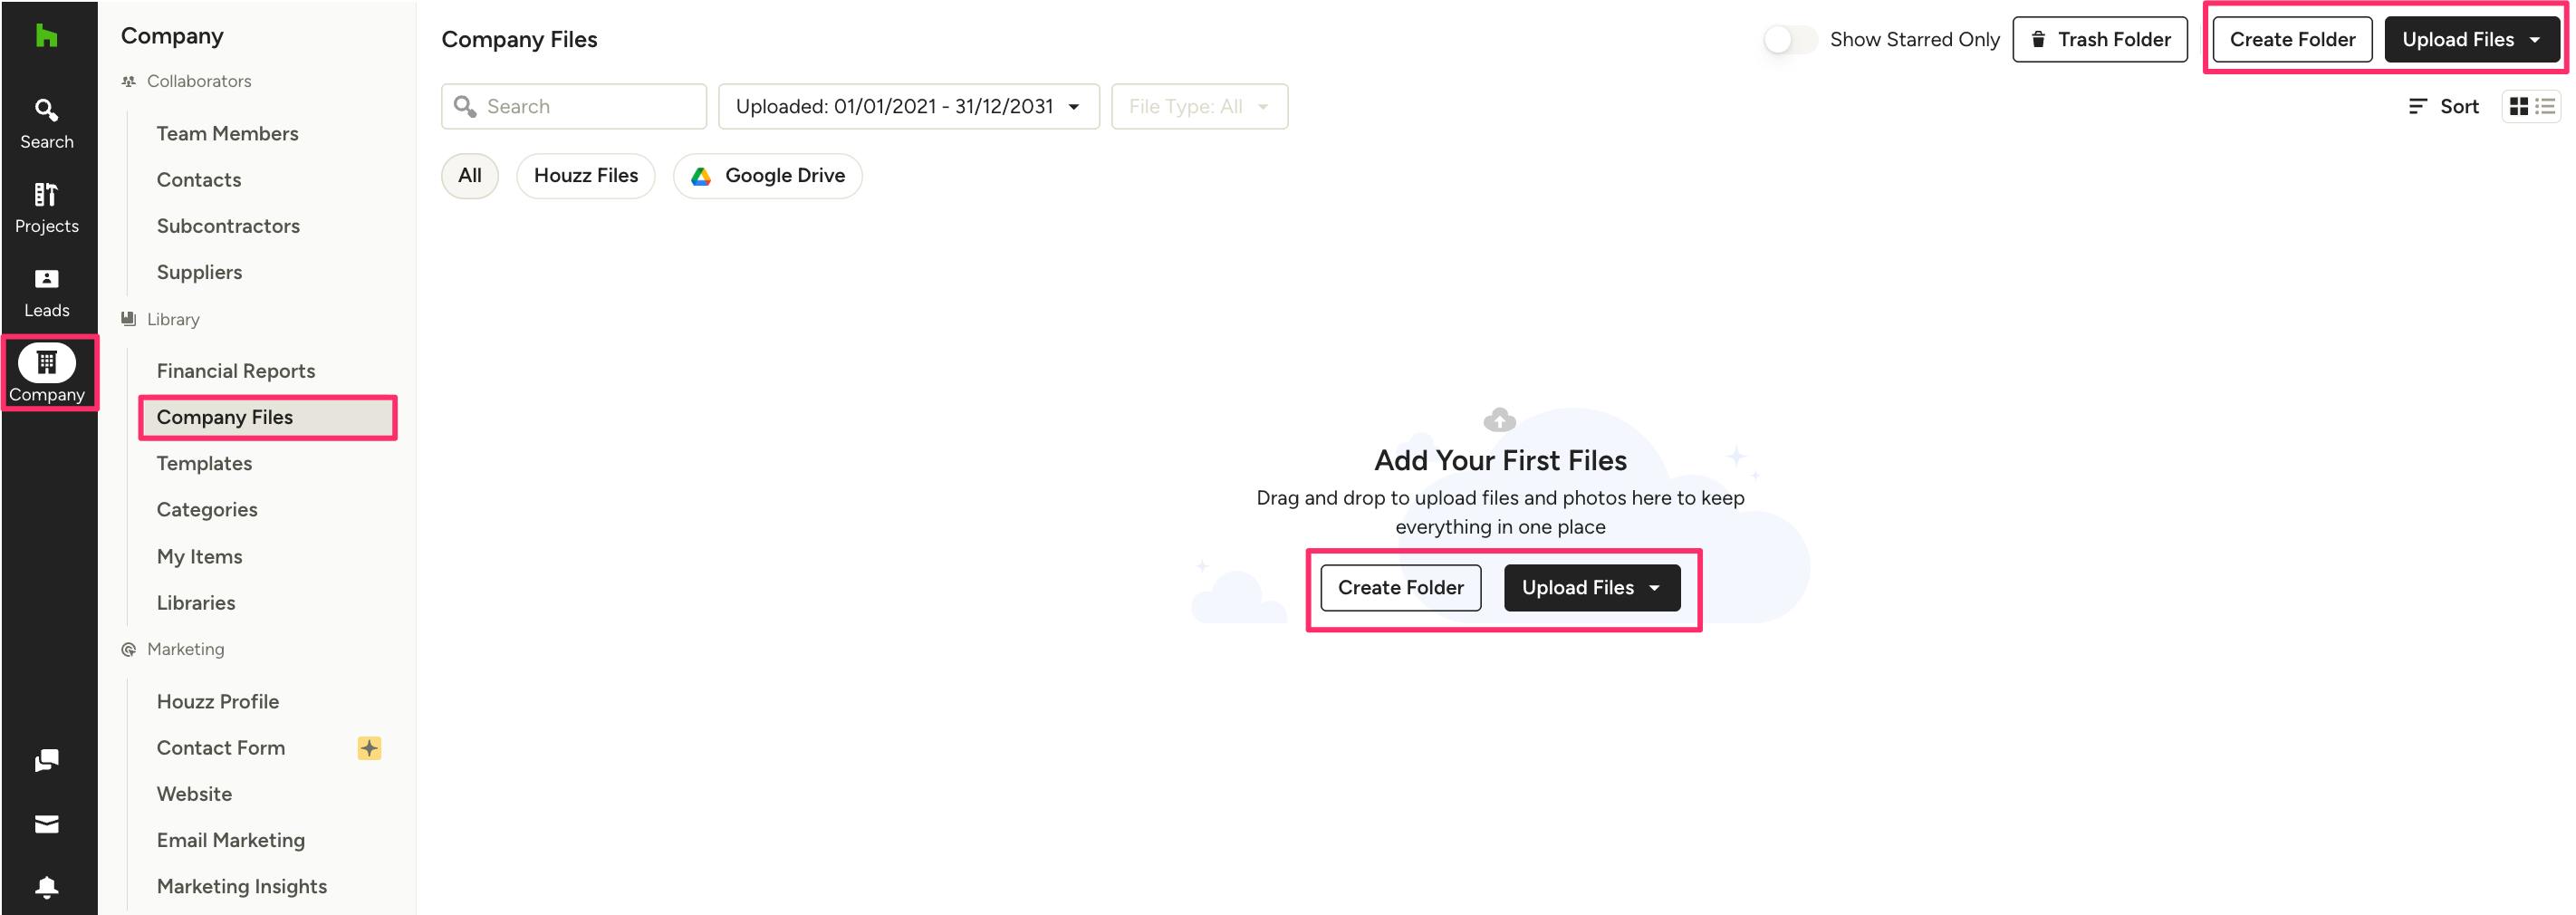
To access your company files, click the Company icon in your left navigation, then select Company Files from the menu.
Your company file page will be empty to start. Click Upload Files or Create Folder to get started.
Upload Company Files
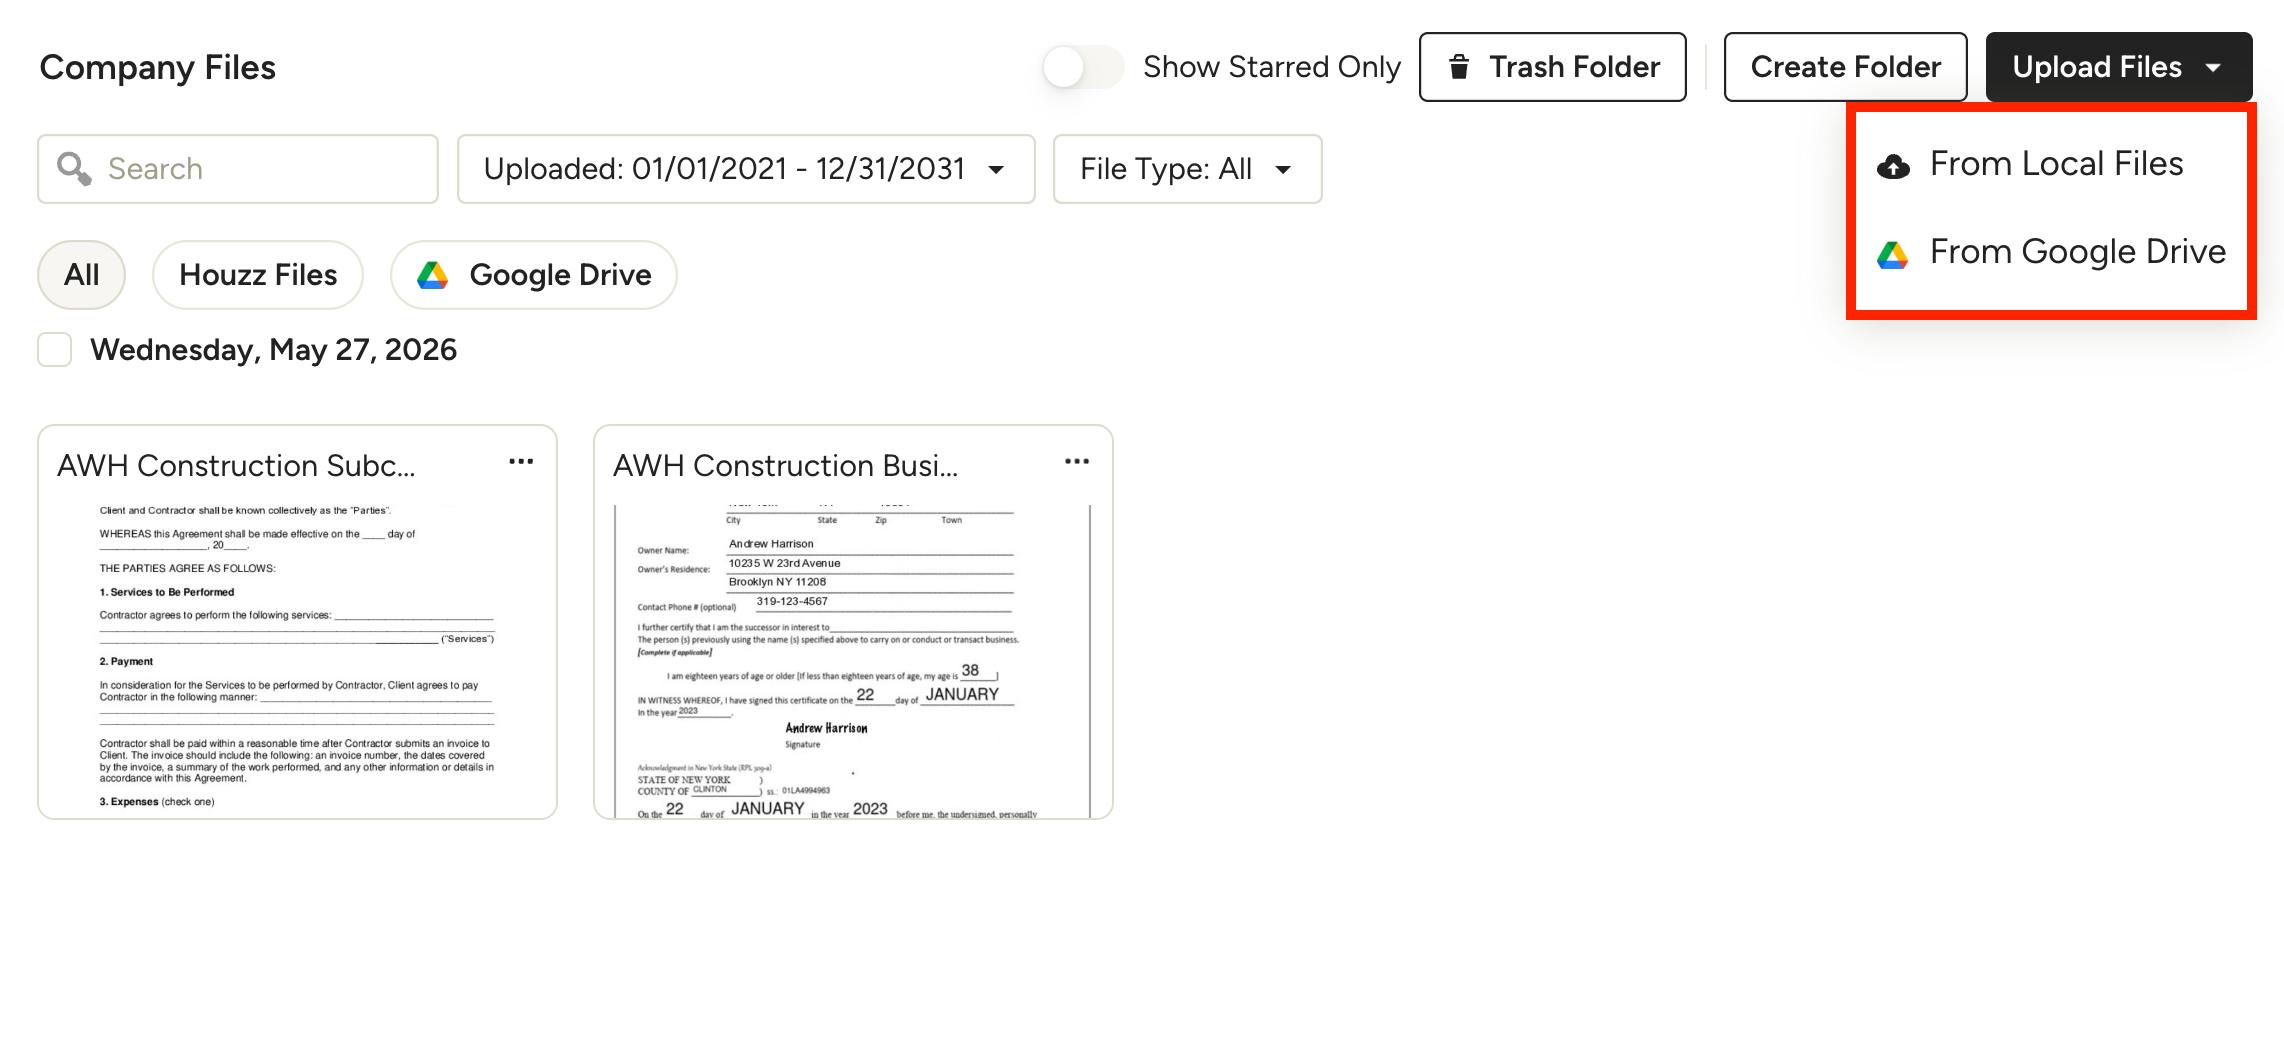
When you select Upload Files within company files, you can select local files from your computer, or you can upload using Google Drive. You can upload multiple files at once. File types that can be uploaded include: images, videos, PDFs, Word documents, Excel spreadsheets, and text files.
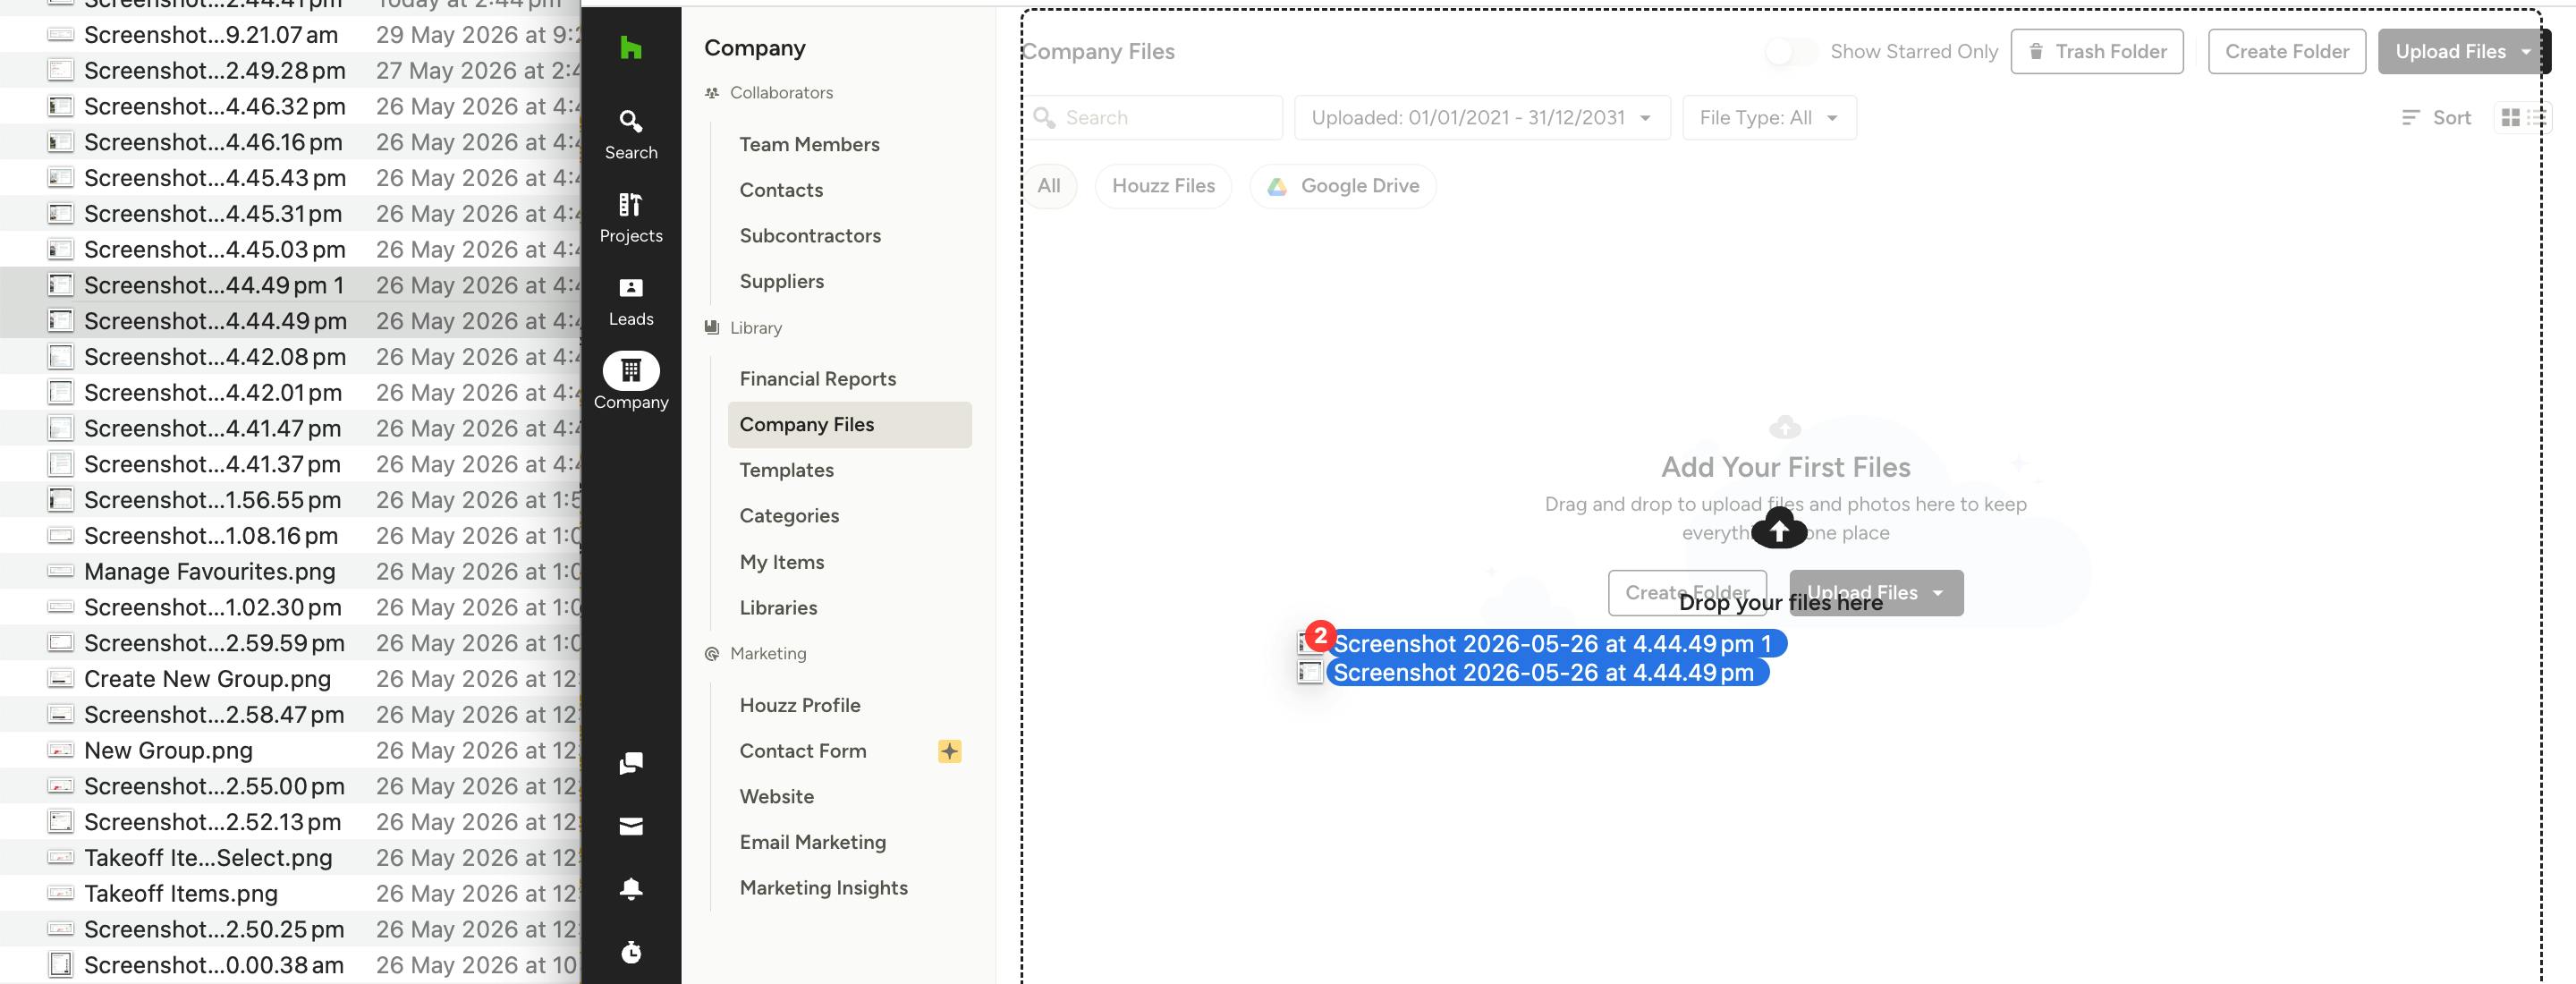
Pro Tip: When adding files from your computer, you can drag and drop multiple files at once directly into the Company Files page (as shown below).
Attach Company Files
Throughout Houzz Pro, there are numerous places to attach existing company files or upload new ones, including:
- Projects and leads
- Financial documents (estimates, proposals, invoices, etc.)
- Selection boards
- Daily logs
- Tasks
- Time and expenses
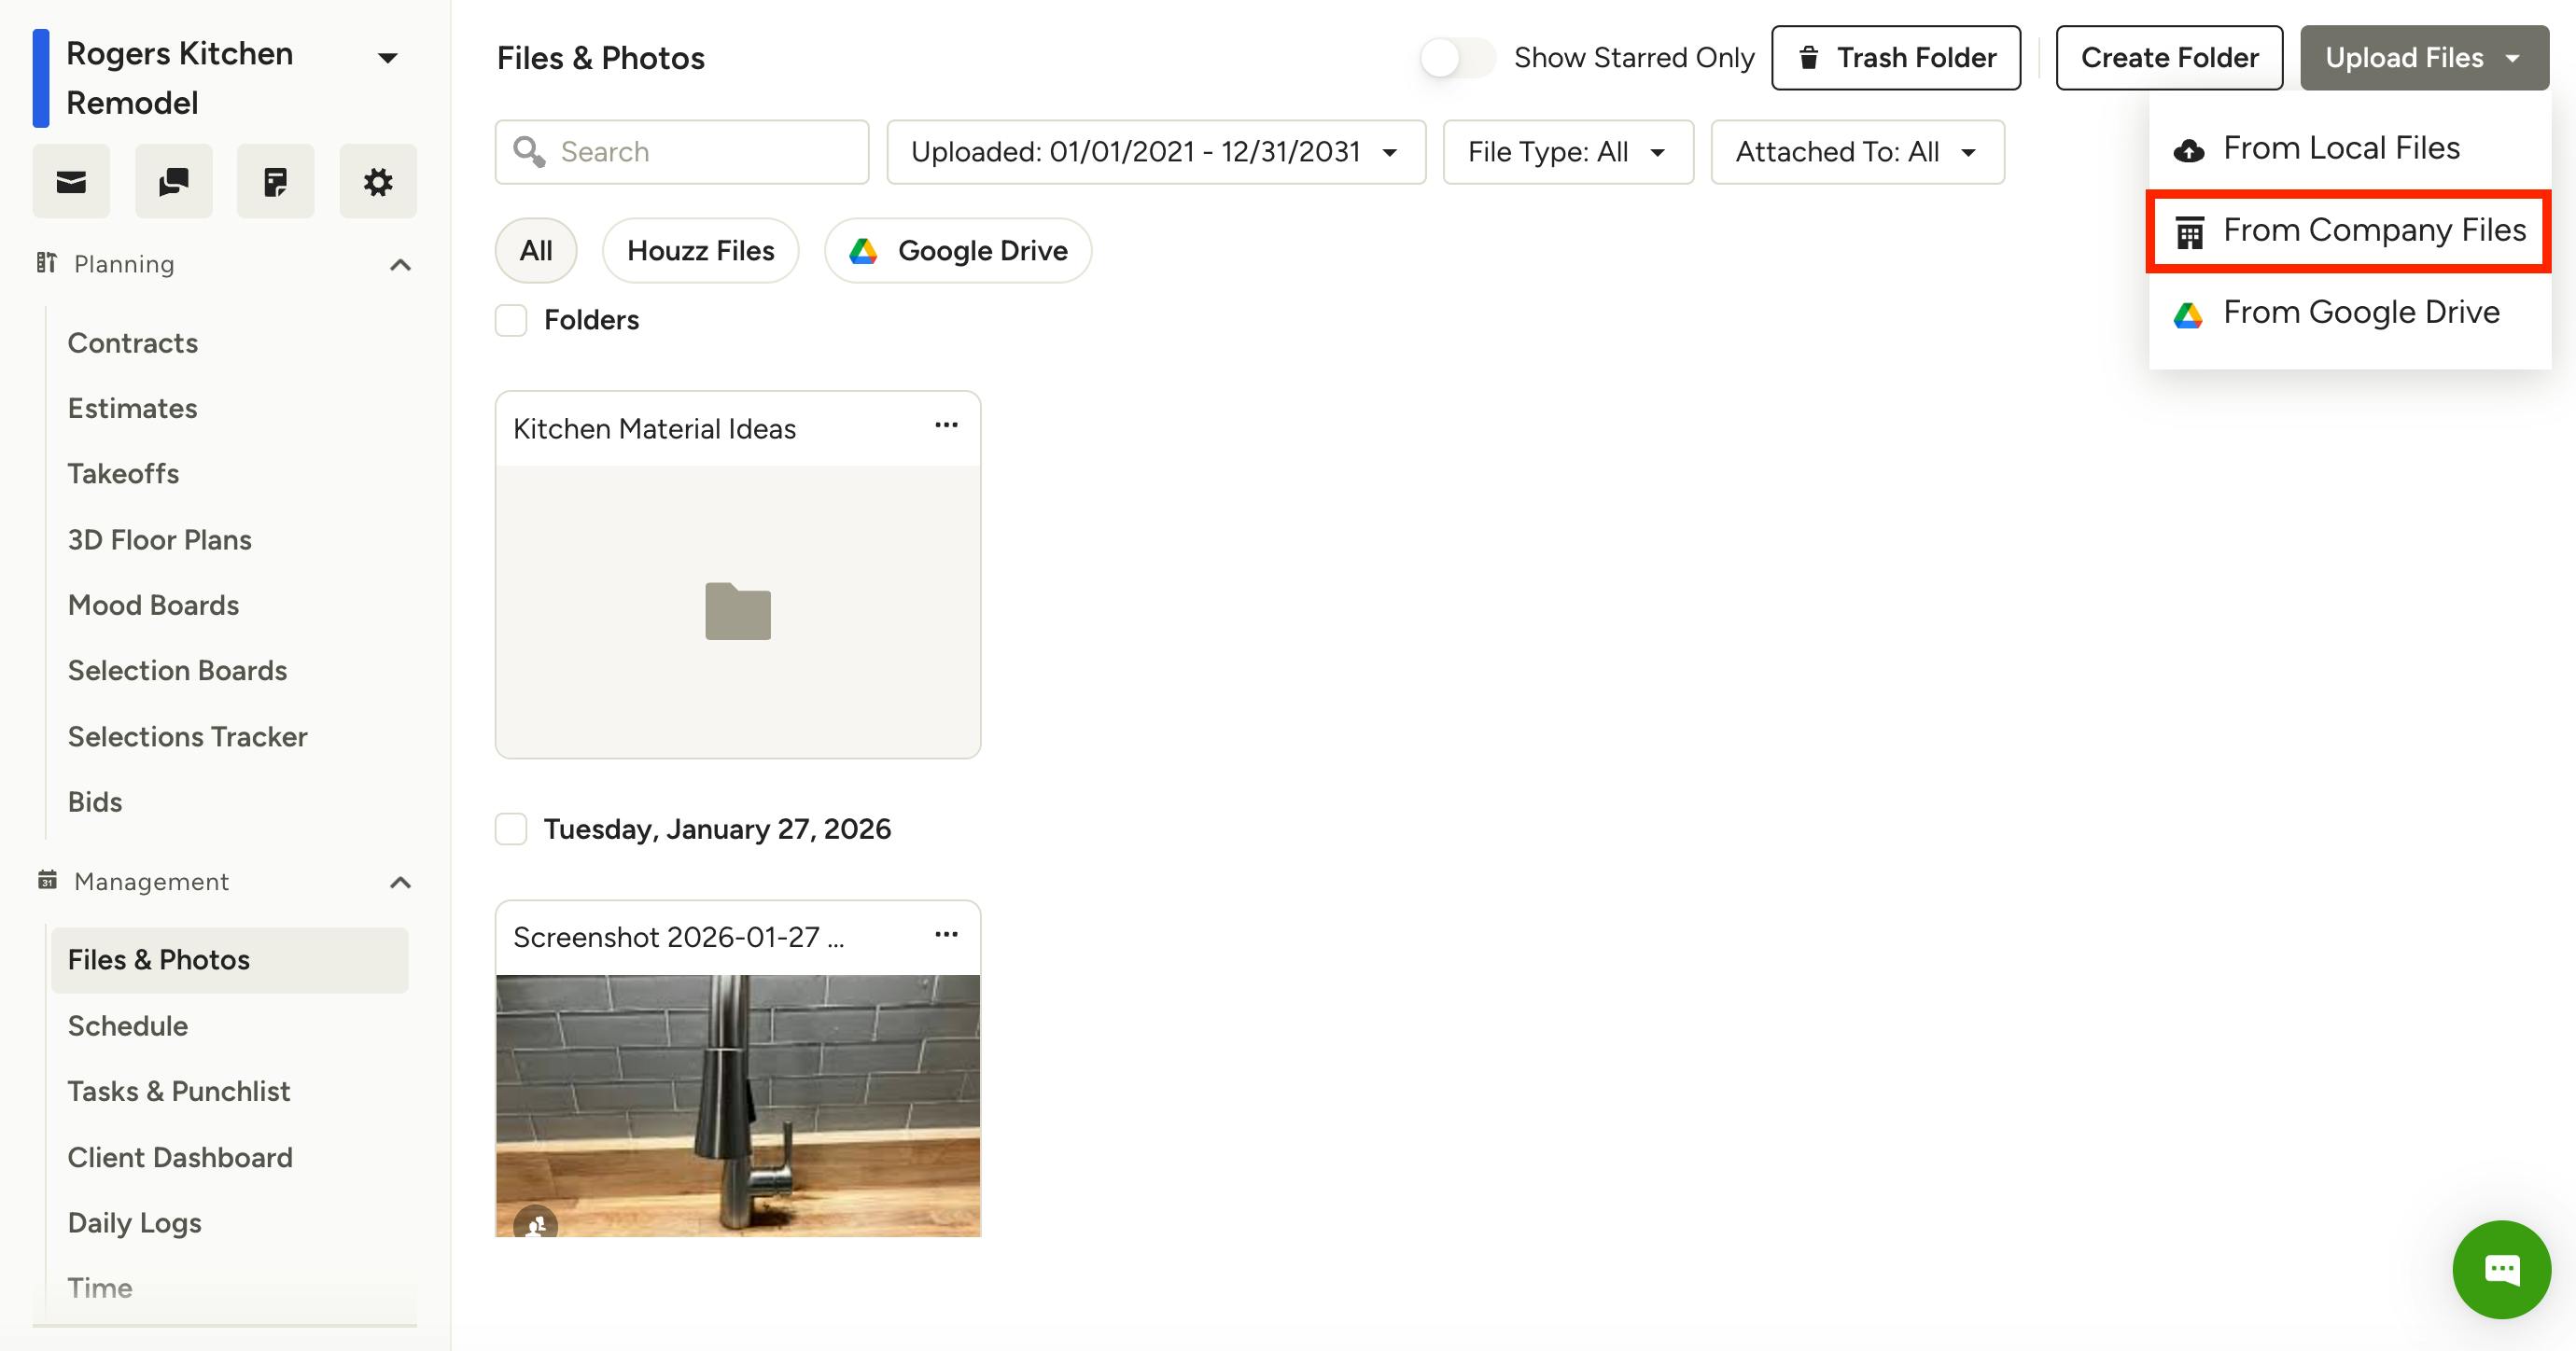
In the Files & Photos section of both projects and leads, look for company files under the Upload Files dropdown menu.
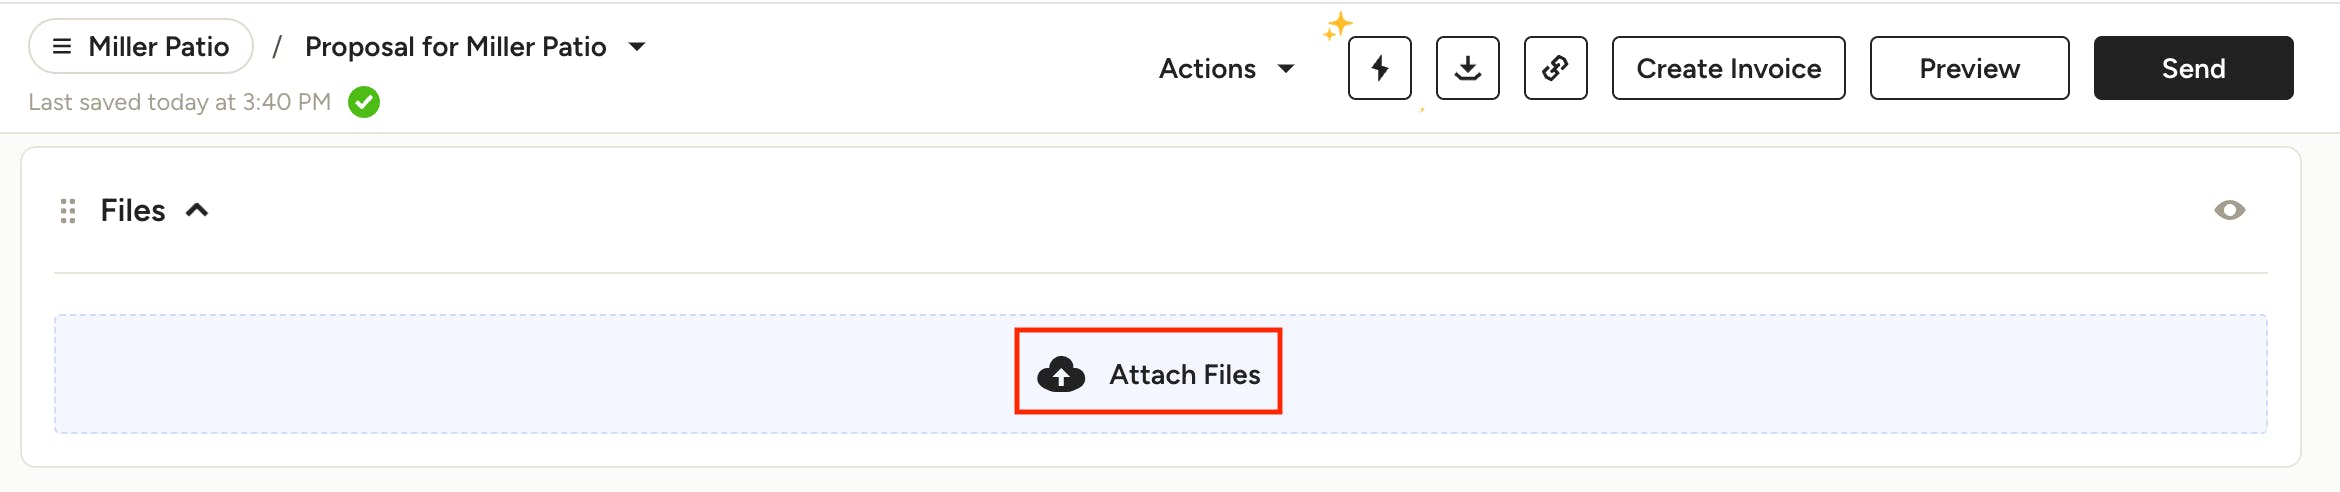
Look for the attachment icon or Attach Files area on documents, daily logs, tasks and time/expenses.
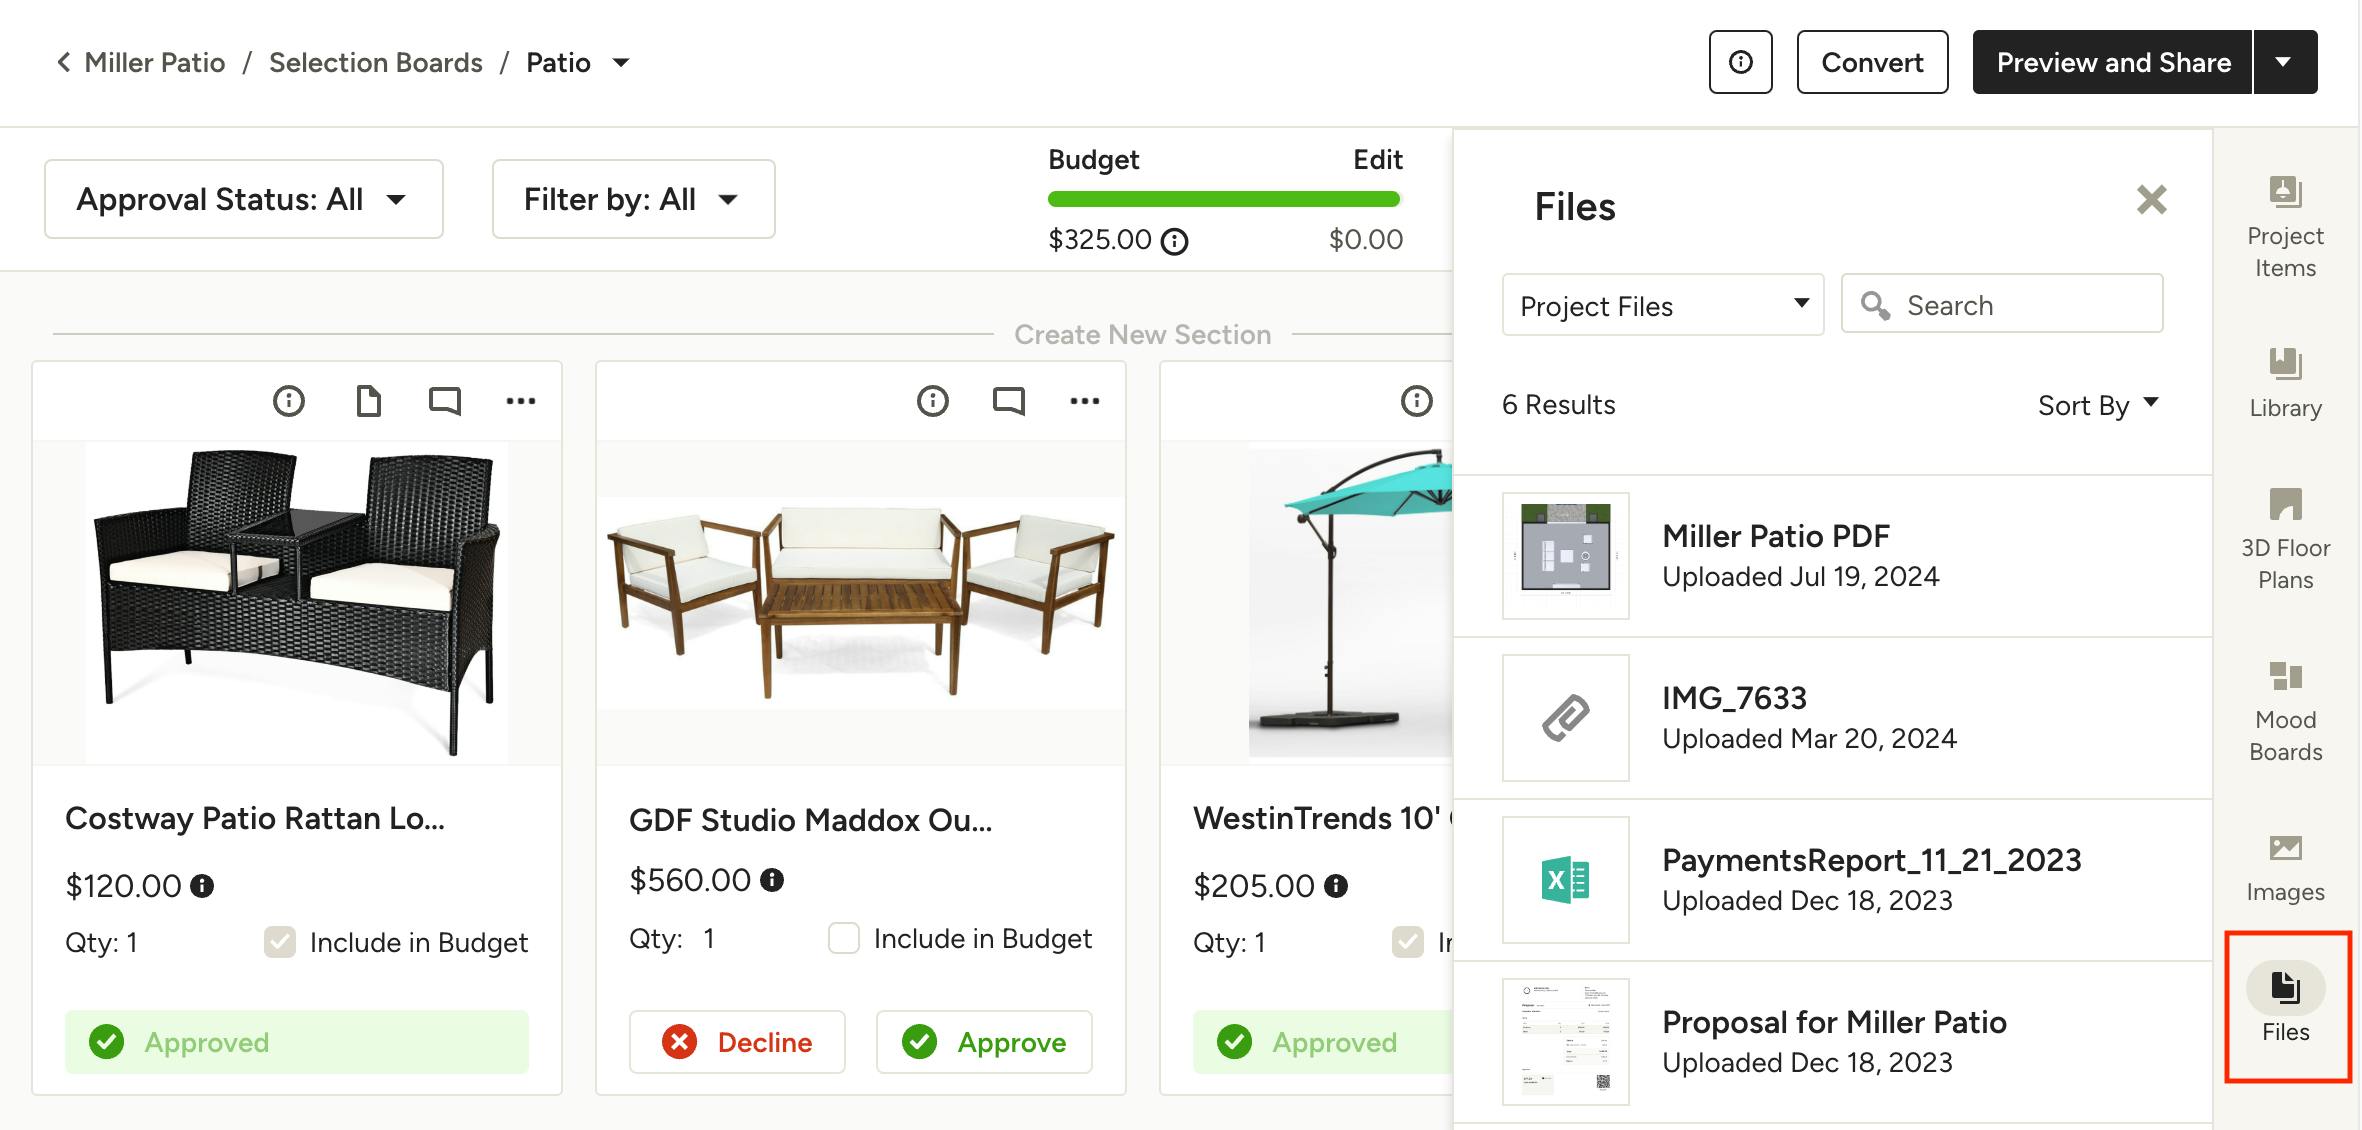
In design and selection tools, look for the Files icon to add new and existing files.
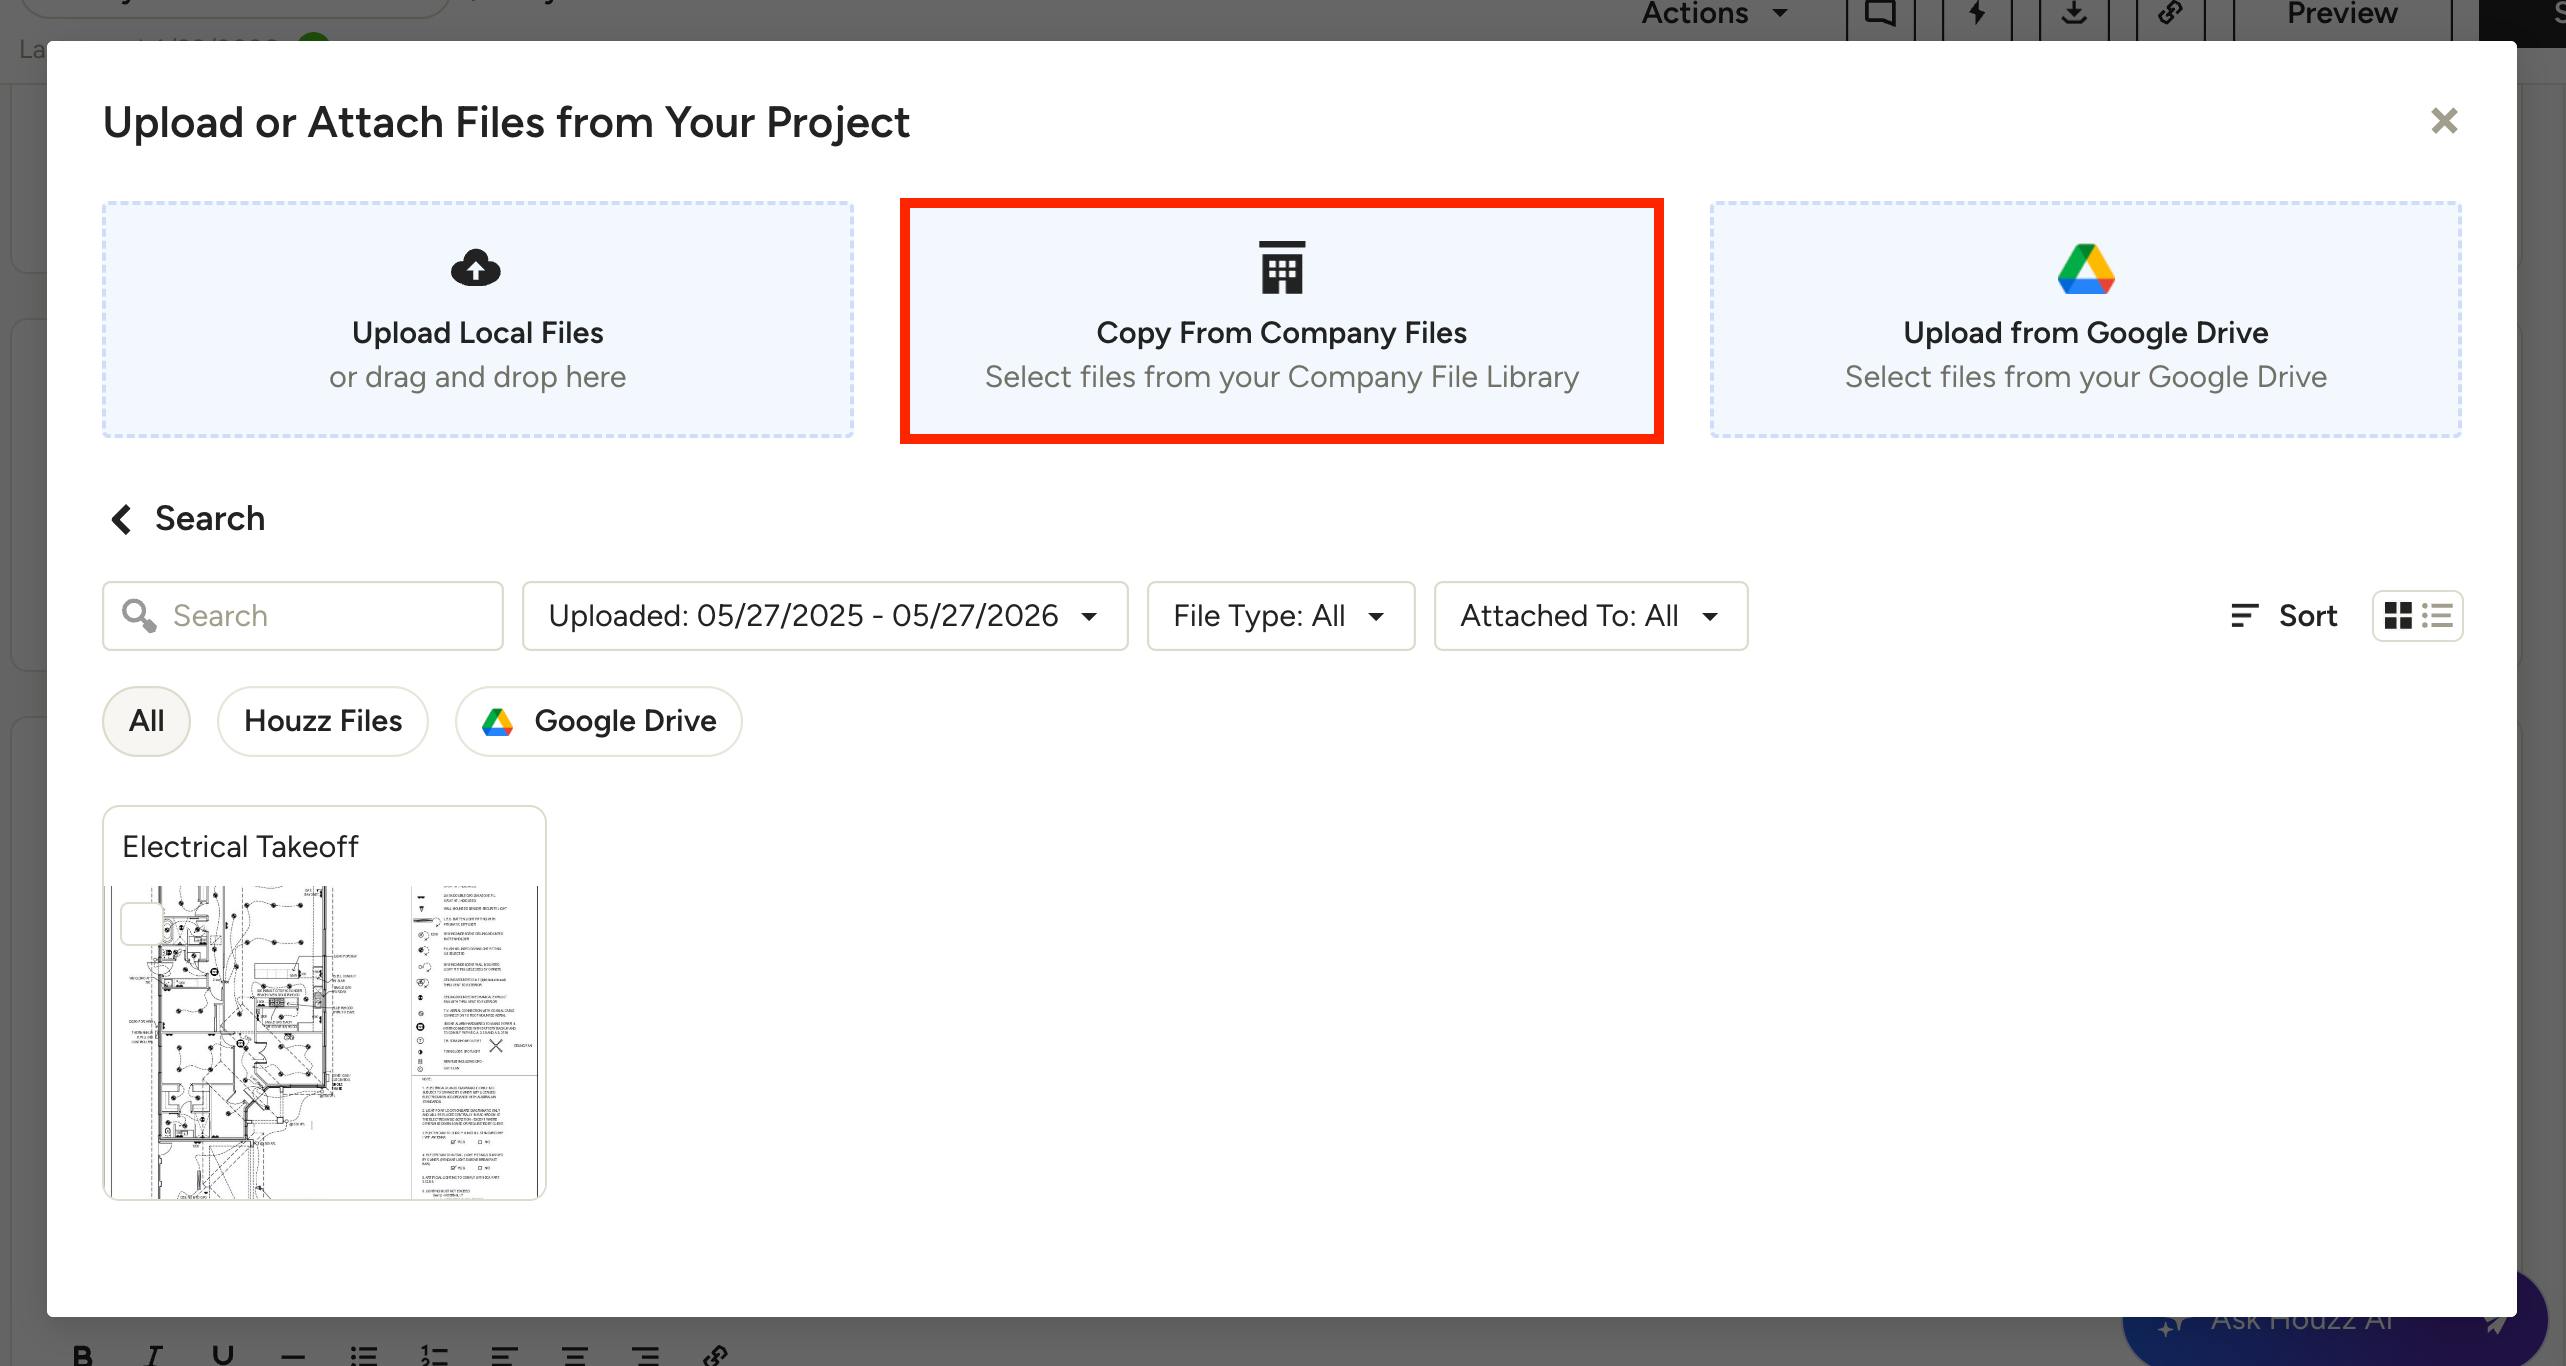
You can then select a file from your company files library. When you do, the file is copied into your project files and used from there (for example, in documents, selection boards, etc.). We don’t attach files directly from company files — instead, a copy is always created within the project or lead to ensure the correct version is used in context.
Please Note: If you don’t have permission to access company files, this option will not be visible, and you won’t be able to use company files when working within projects, leads, or other entities.
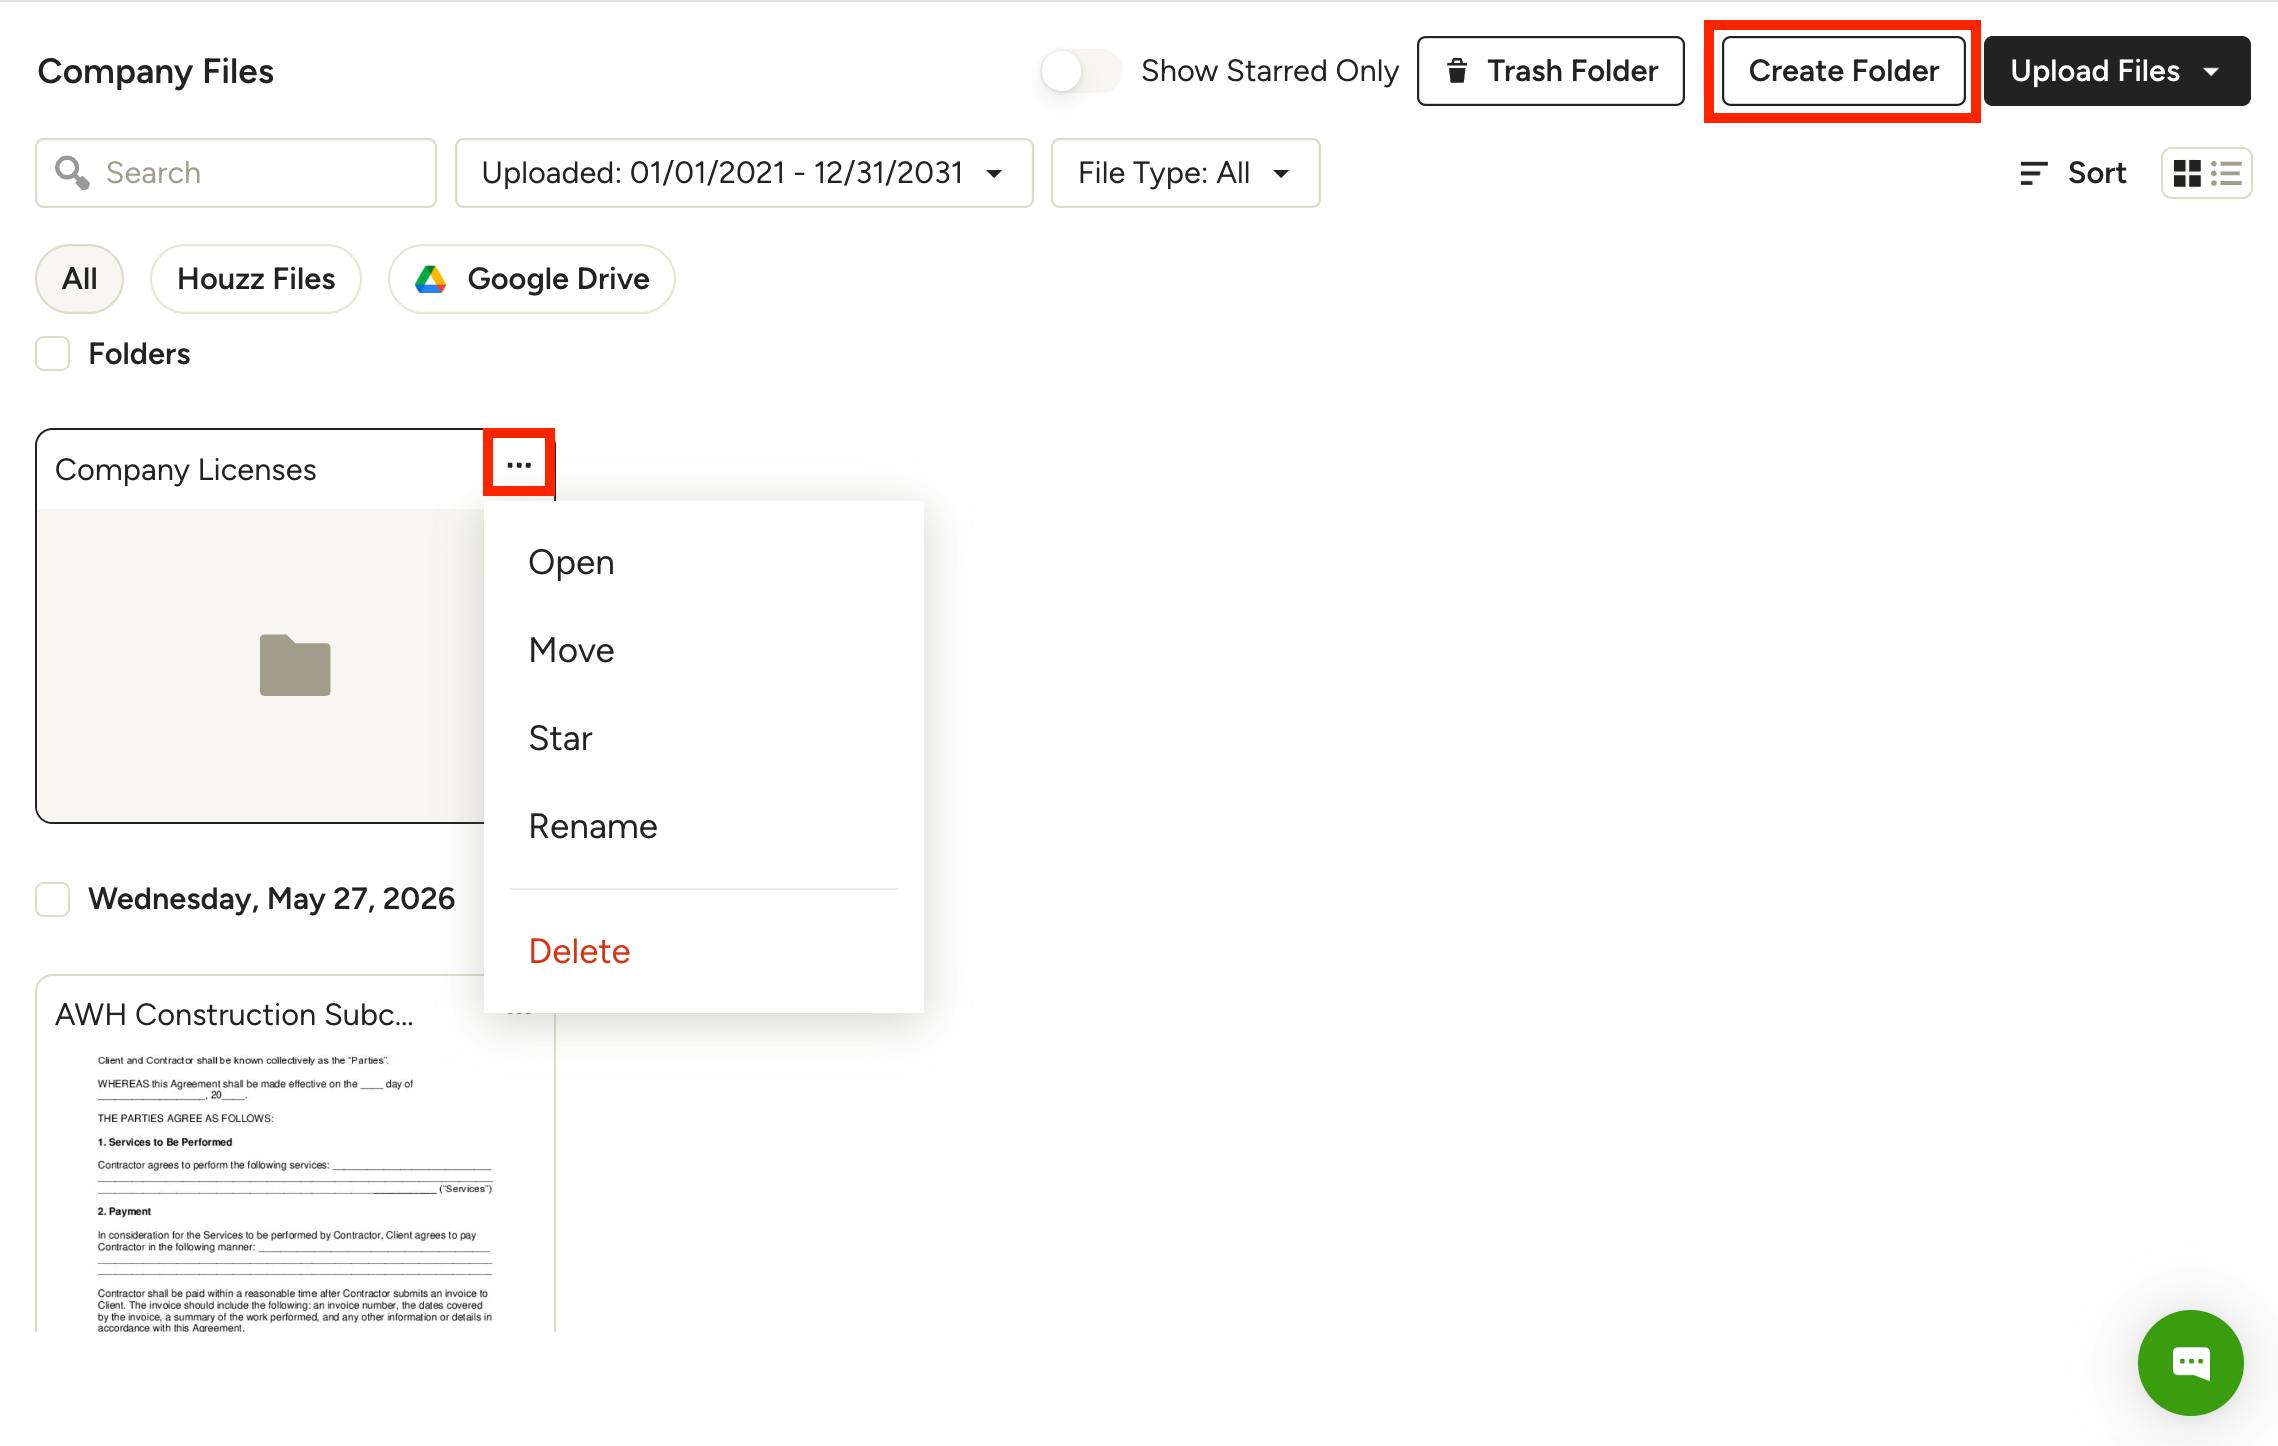
Organise with Folders
You can create folders and even folders within folders to keep your company documents organised. Just click the Create Folder button in the top right of the page, add a folder name, then click Create. Select the three dots icon for each folder to open, move, star as a favourite, rename, or delete.
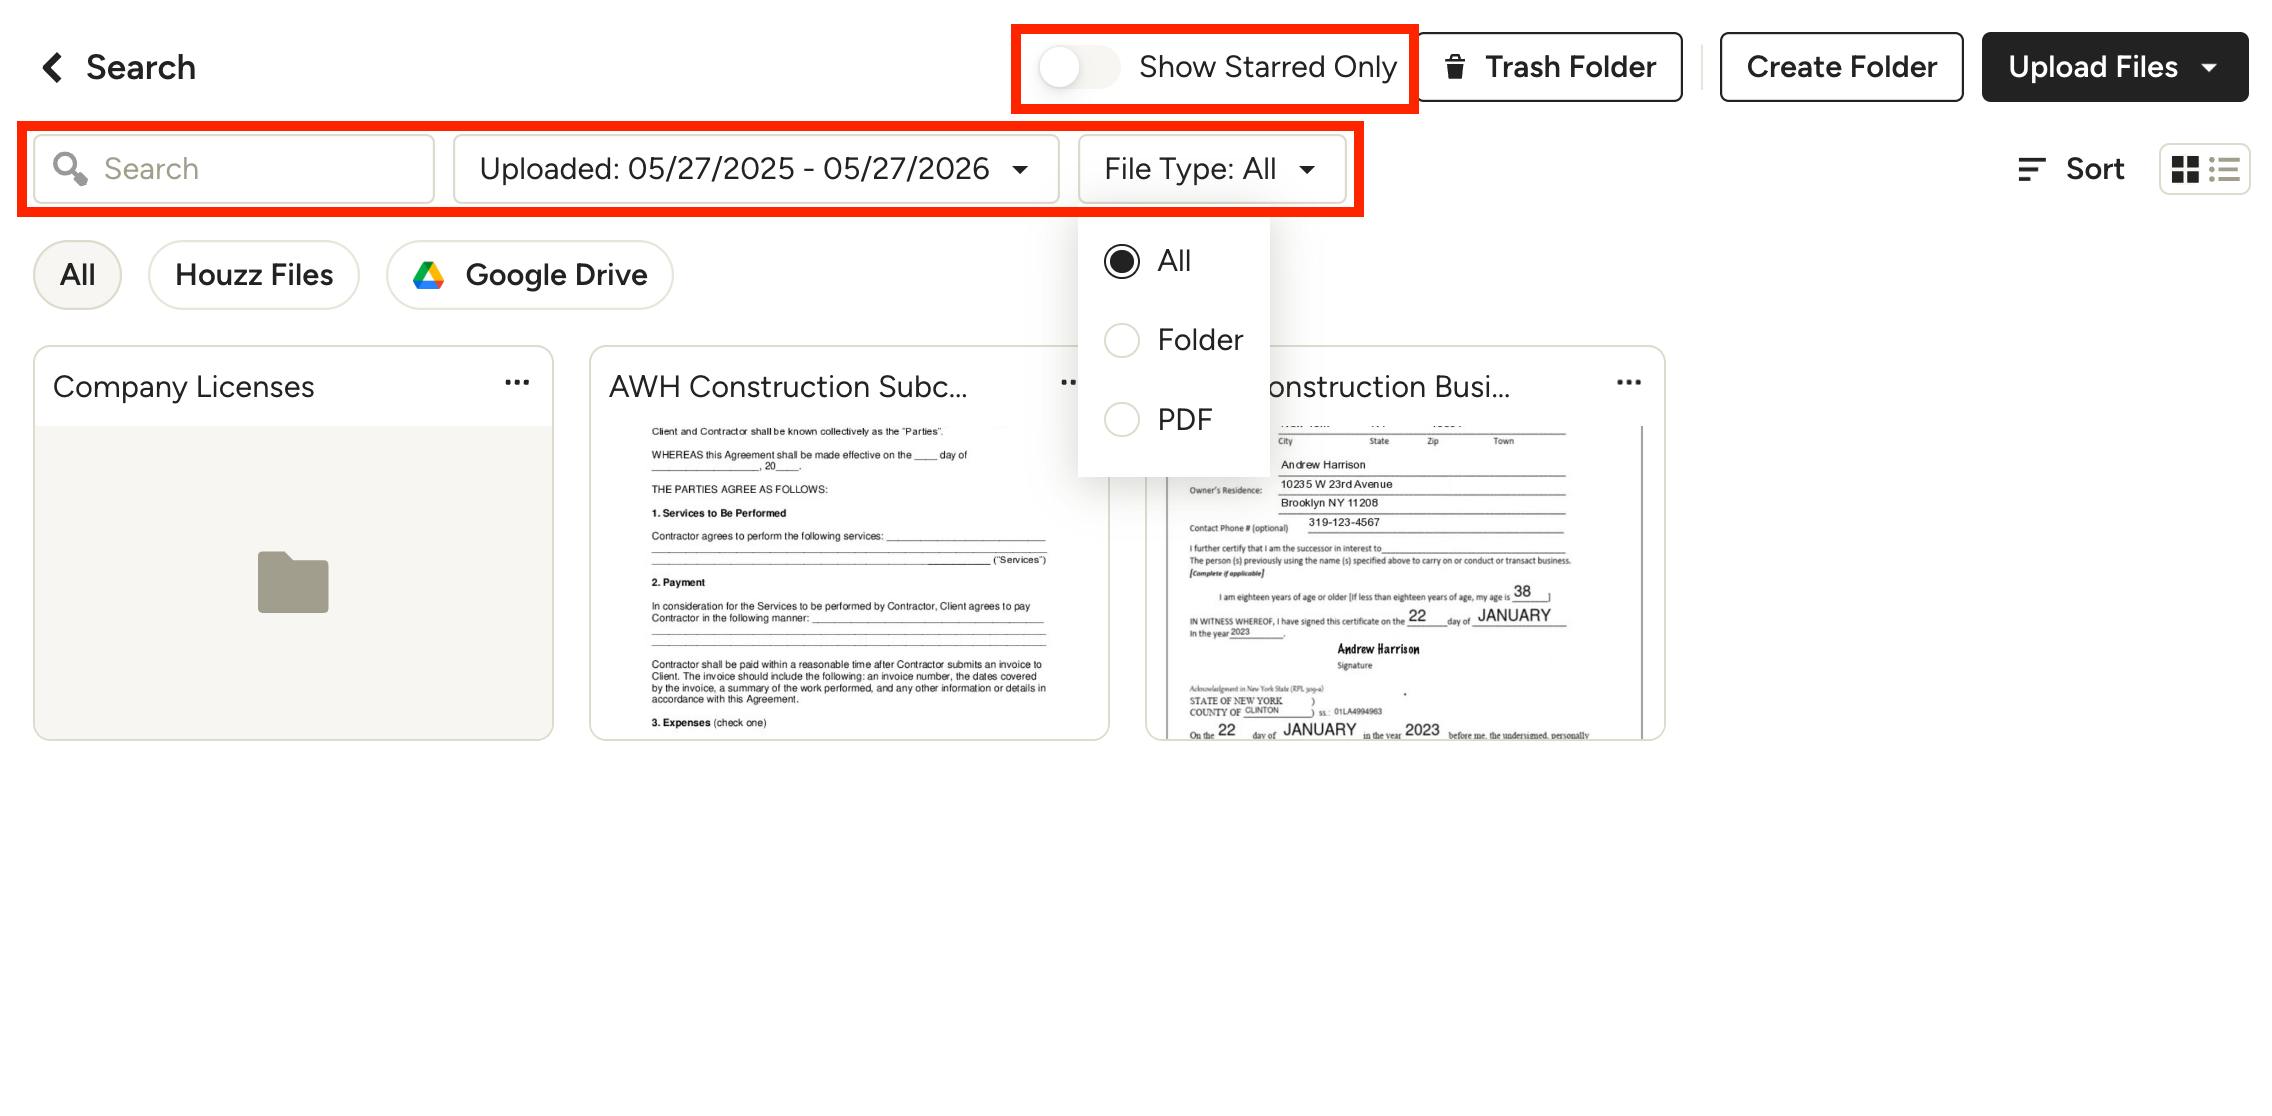
Search and Filter Through Files
Search for a file or folder name, or filter by upload date or file type. You can also turn on the “Show Starred only” toggle to narrow down the list to only your favourite files.
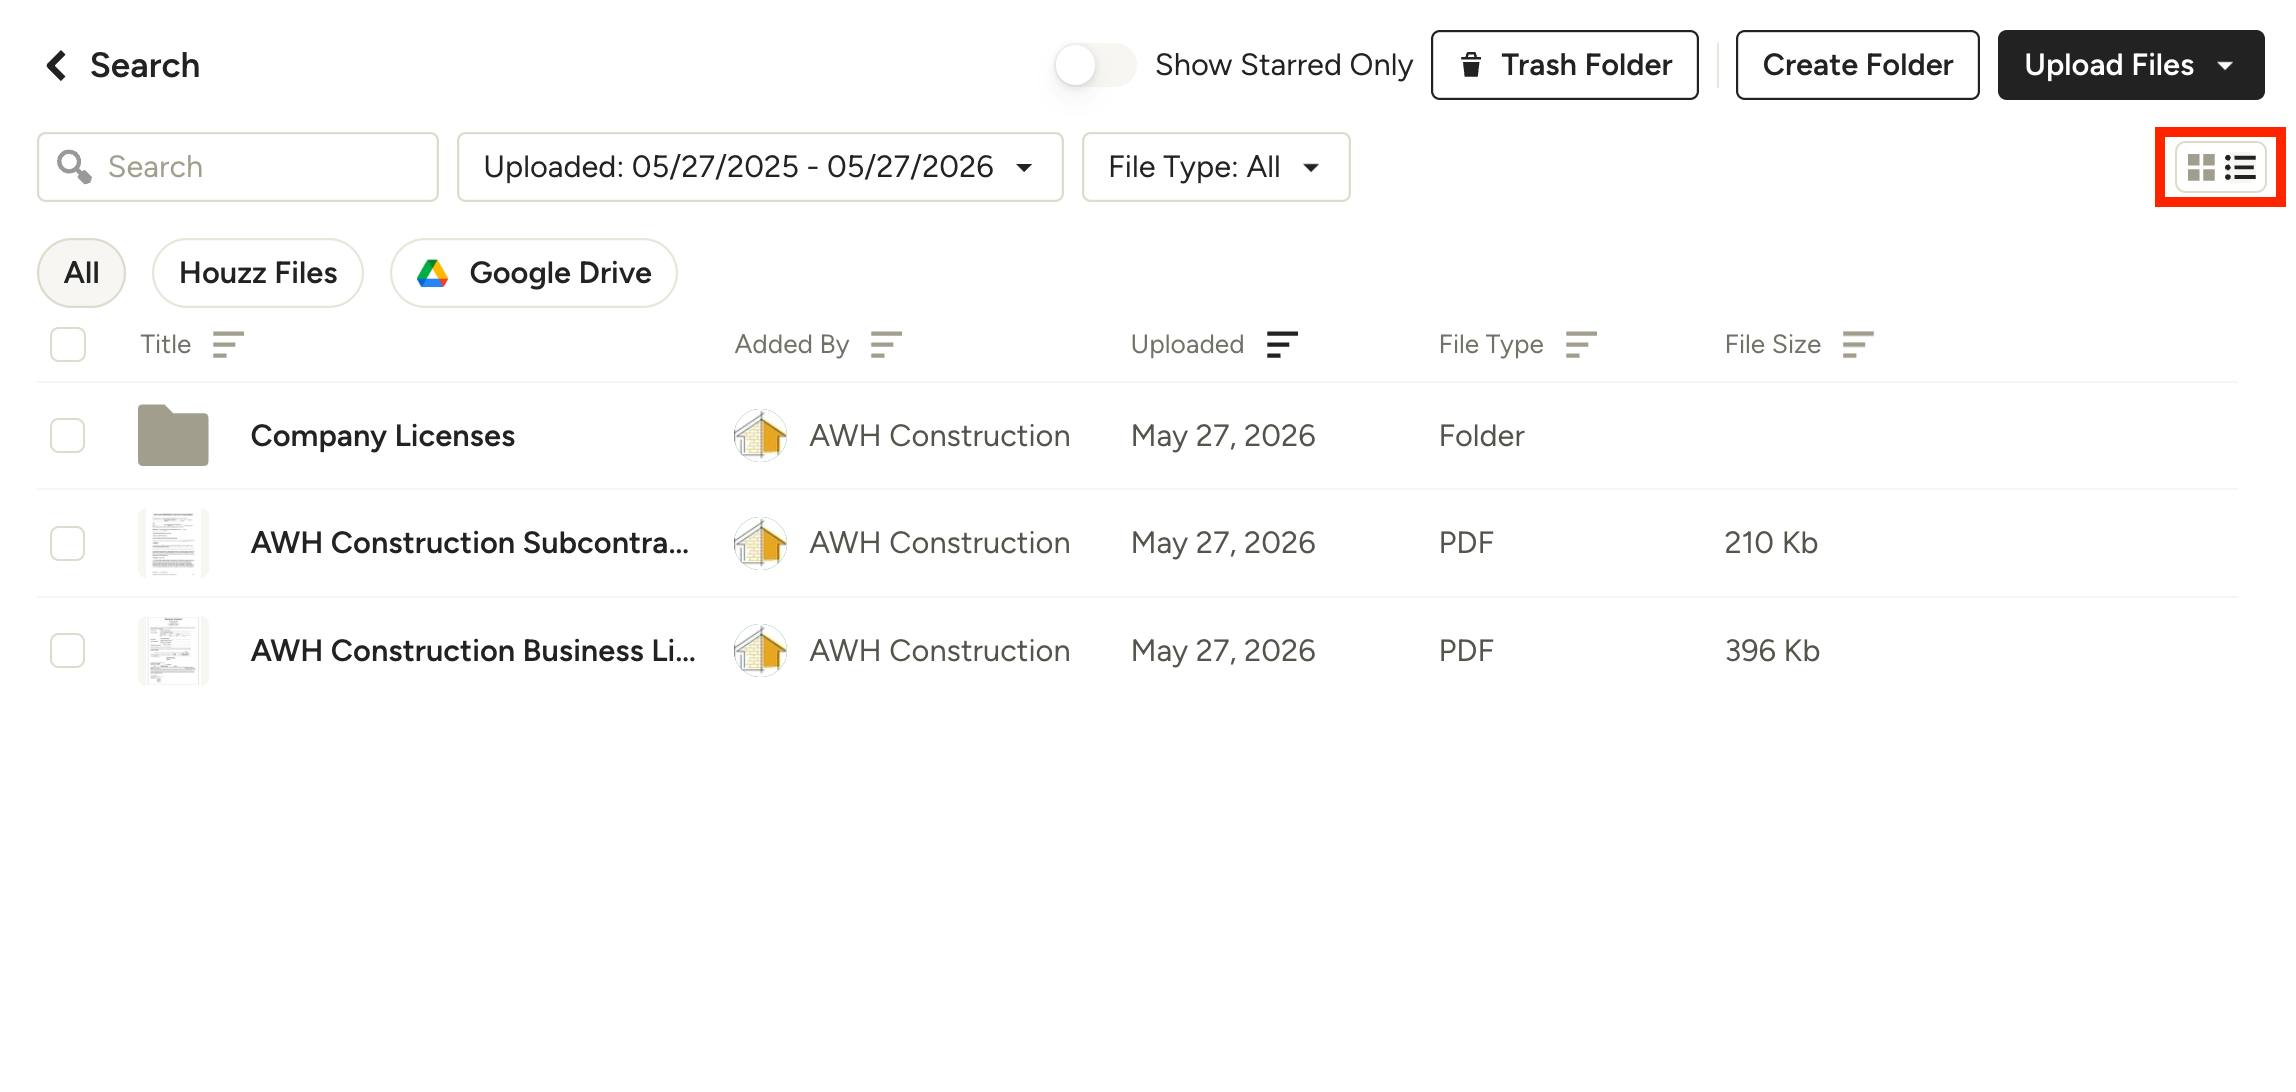
Adjust View of Files
You can easily toggle your view of your files between a list or grid layout by using the icons in the top right.
List View: You can see a quick overview of all the relevant info pertaining to each item, including who added the file, when it was uploaded, file type, and file size. Click on a column header to sort the files by that category.
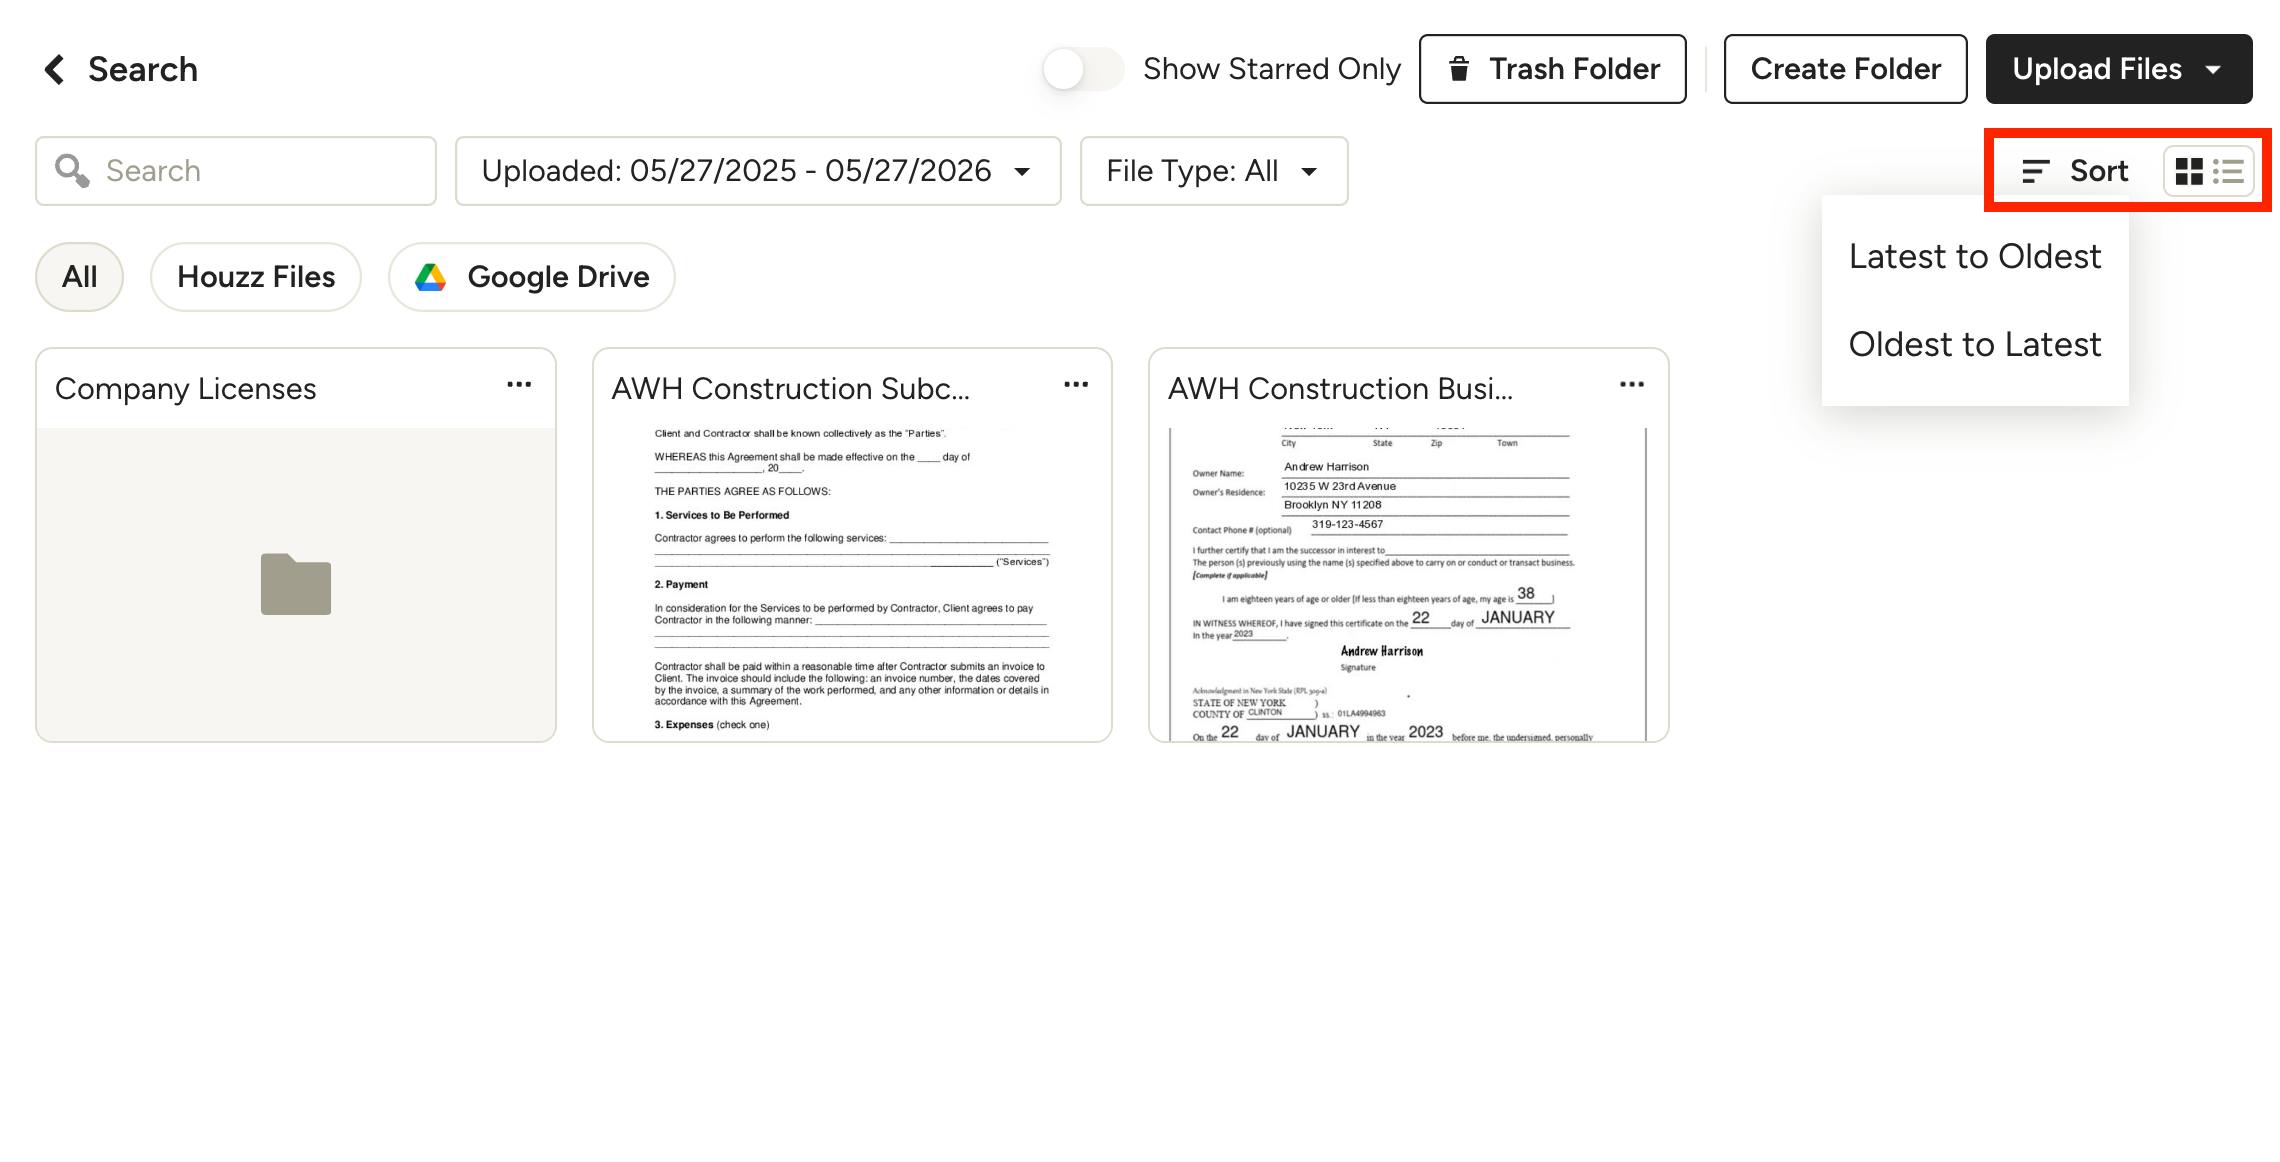
Grid View: You'll see larger thumbnails of each file, making it easy to preview files without having to open each one. You can sort by upload date (oldest to latest, or latest to oldest) in grid view by using the Sort menu in the top right.
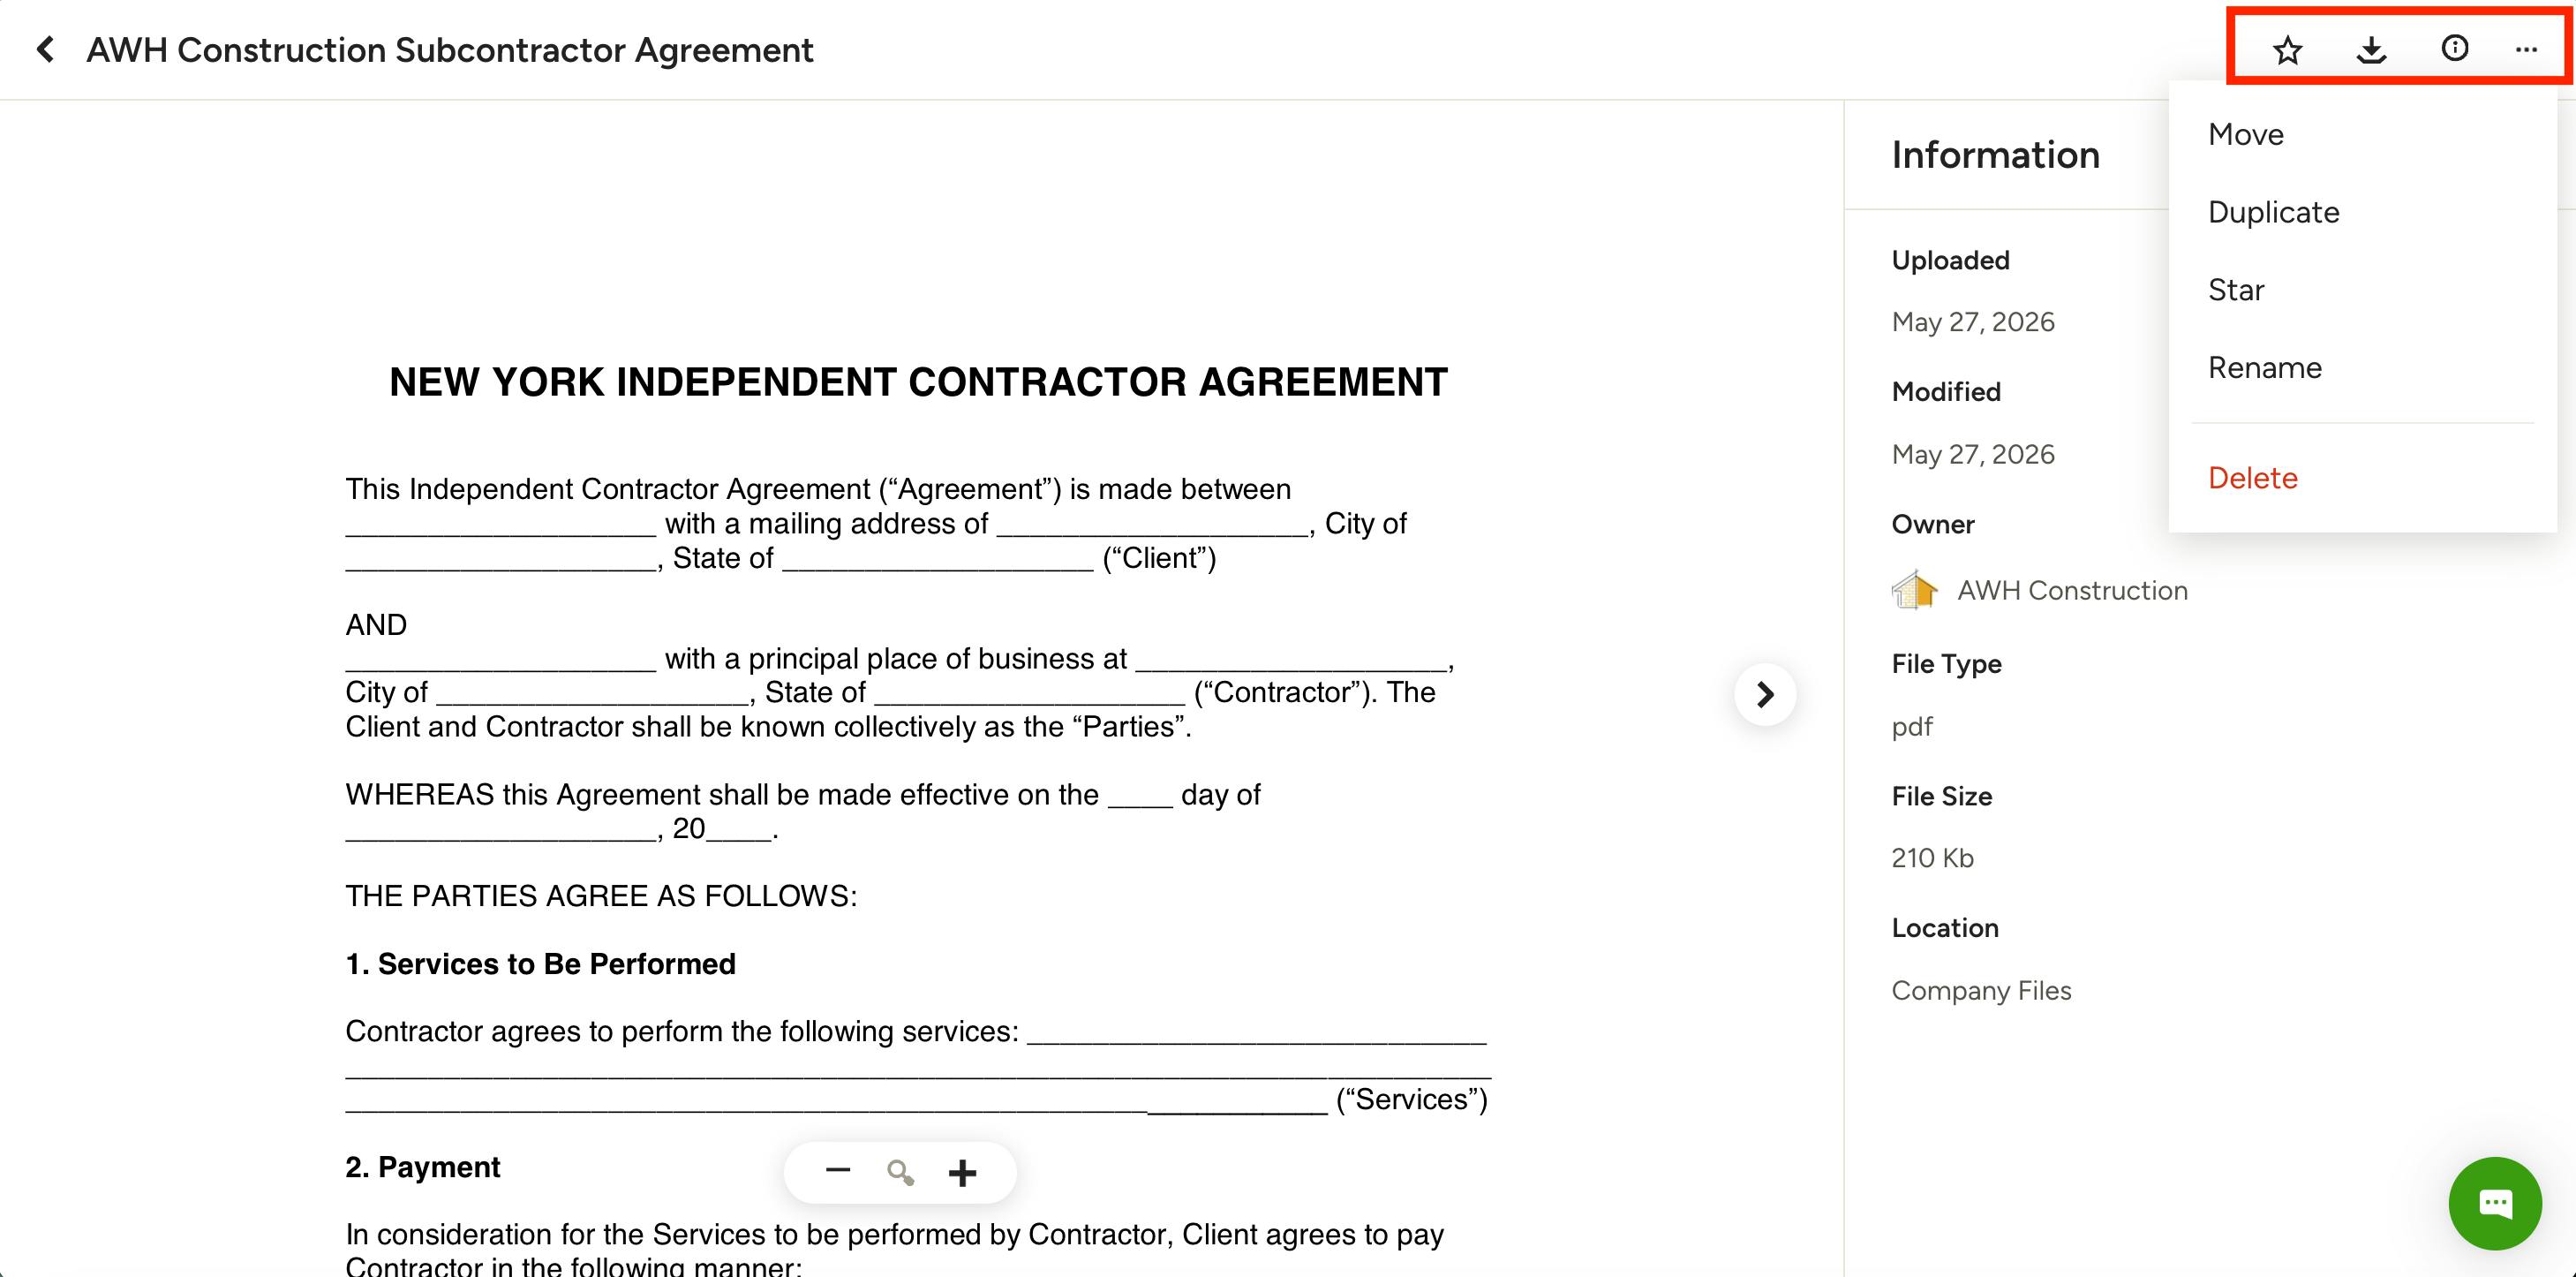
Preview Your Files
Just click on a file to open its preview. At the top of your preview, you can:
- Select the star icon to favourite a file.
- Select the download icon to download a file.
- Select the i icon to view file details like upload date, last modified date, file owner, file type, file size, and file location.
- Select the three dots icon to move, duplicate, unstar/star, rename, or delete.
Please Note: Unlike with files in projects, you can't add comments to company files.
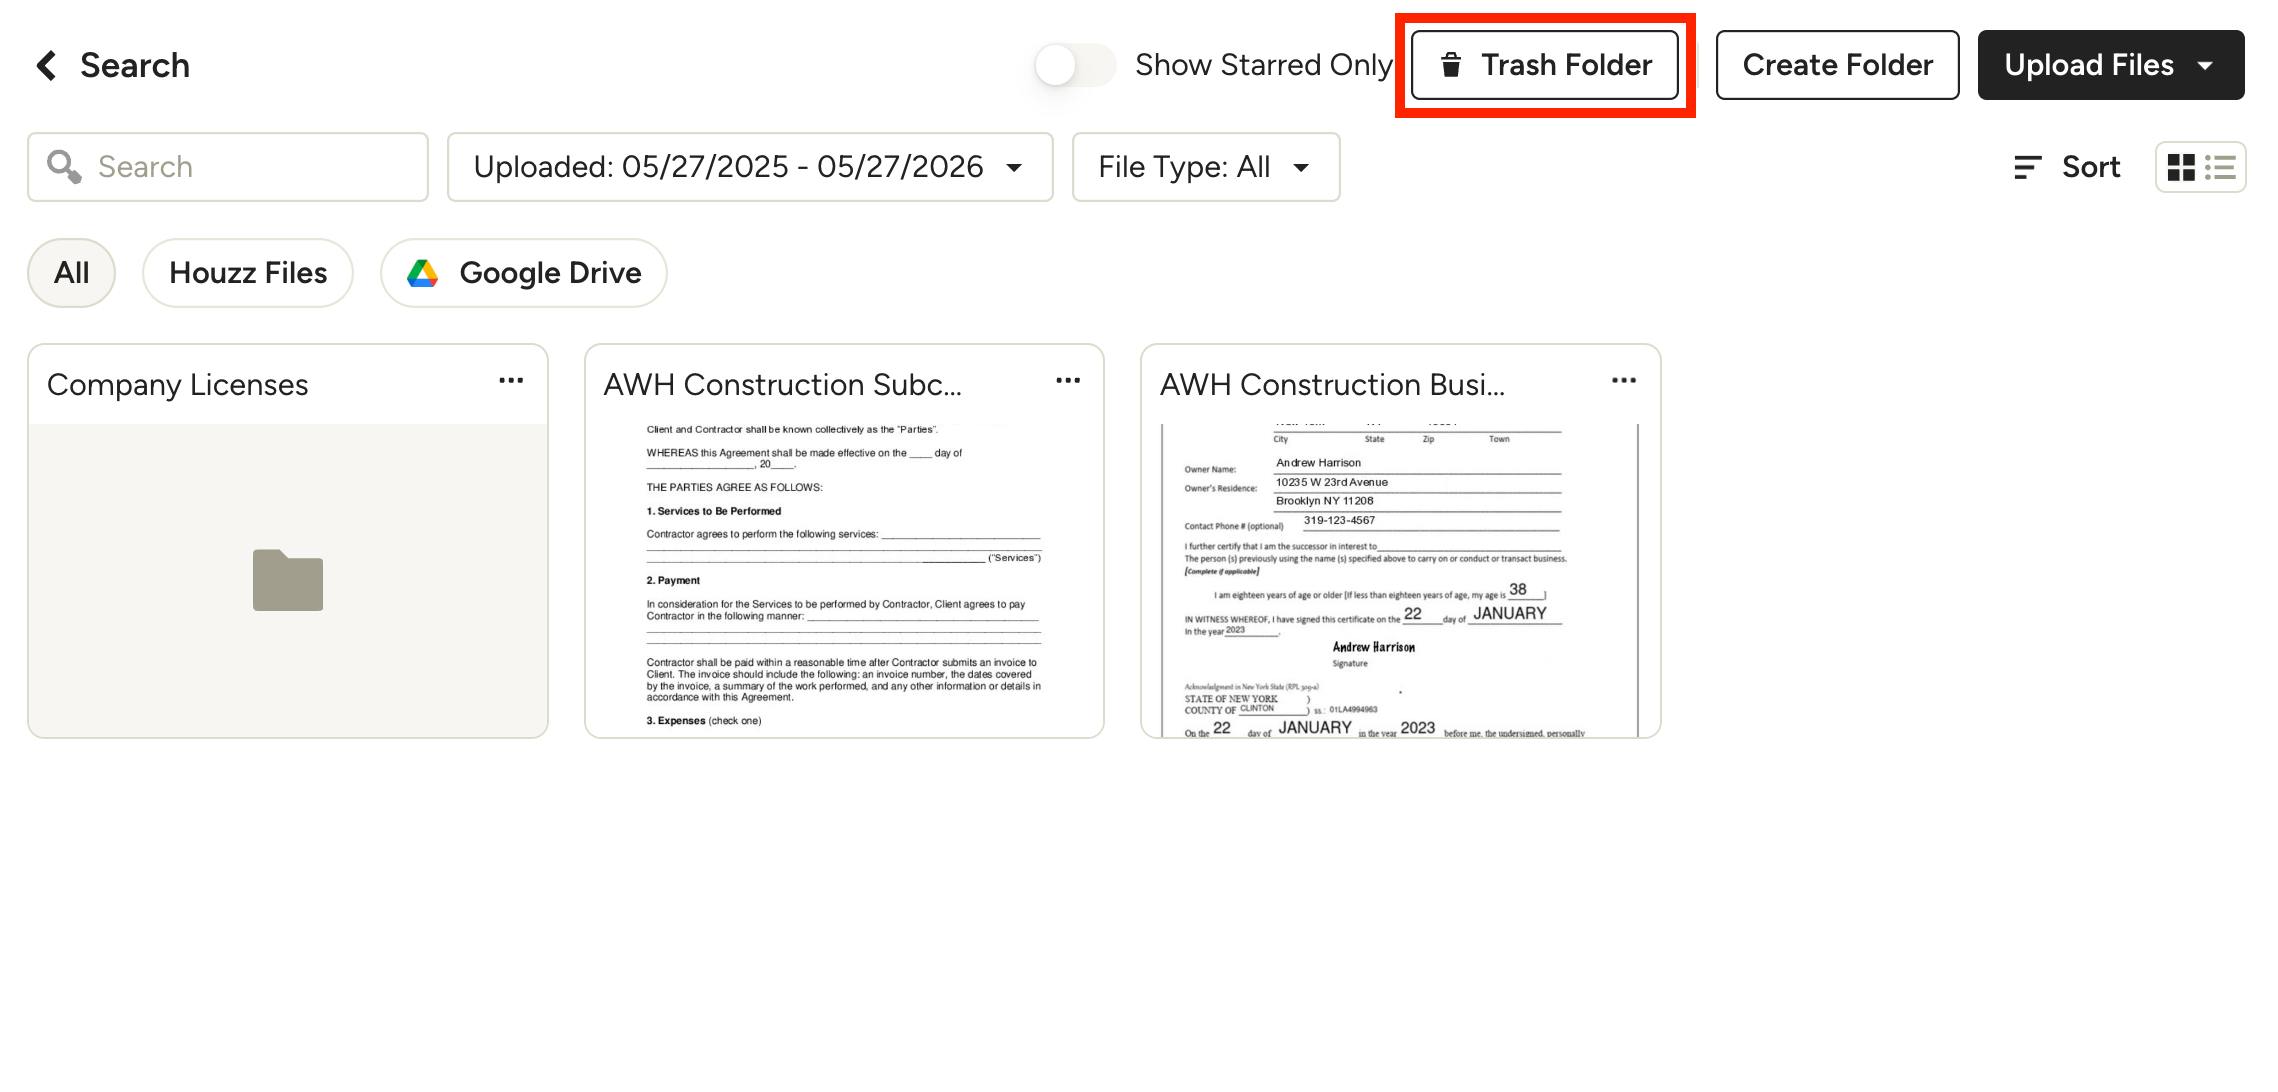
Access Deleted Files
By clicking the Trash Folder button in the top right, you can access deleted files at any time.
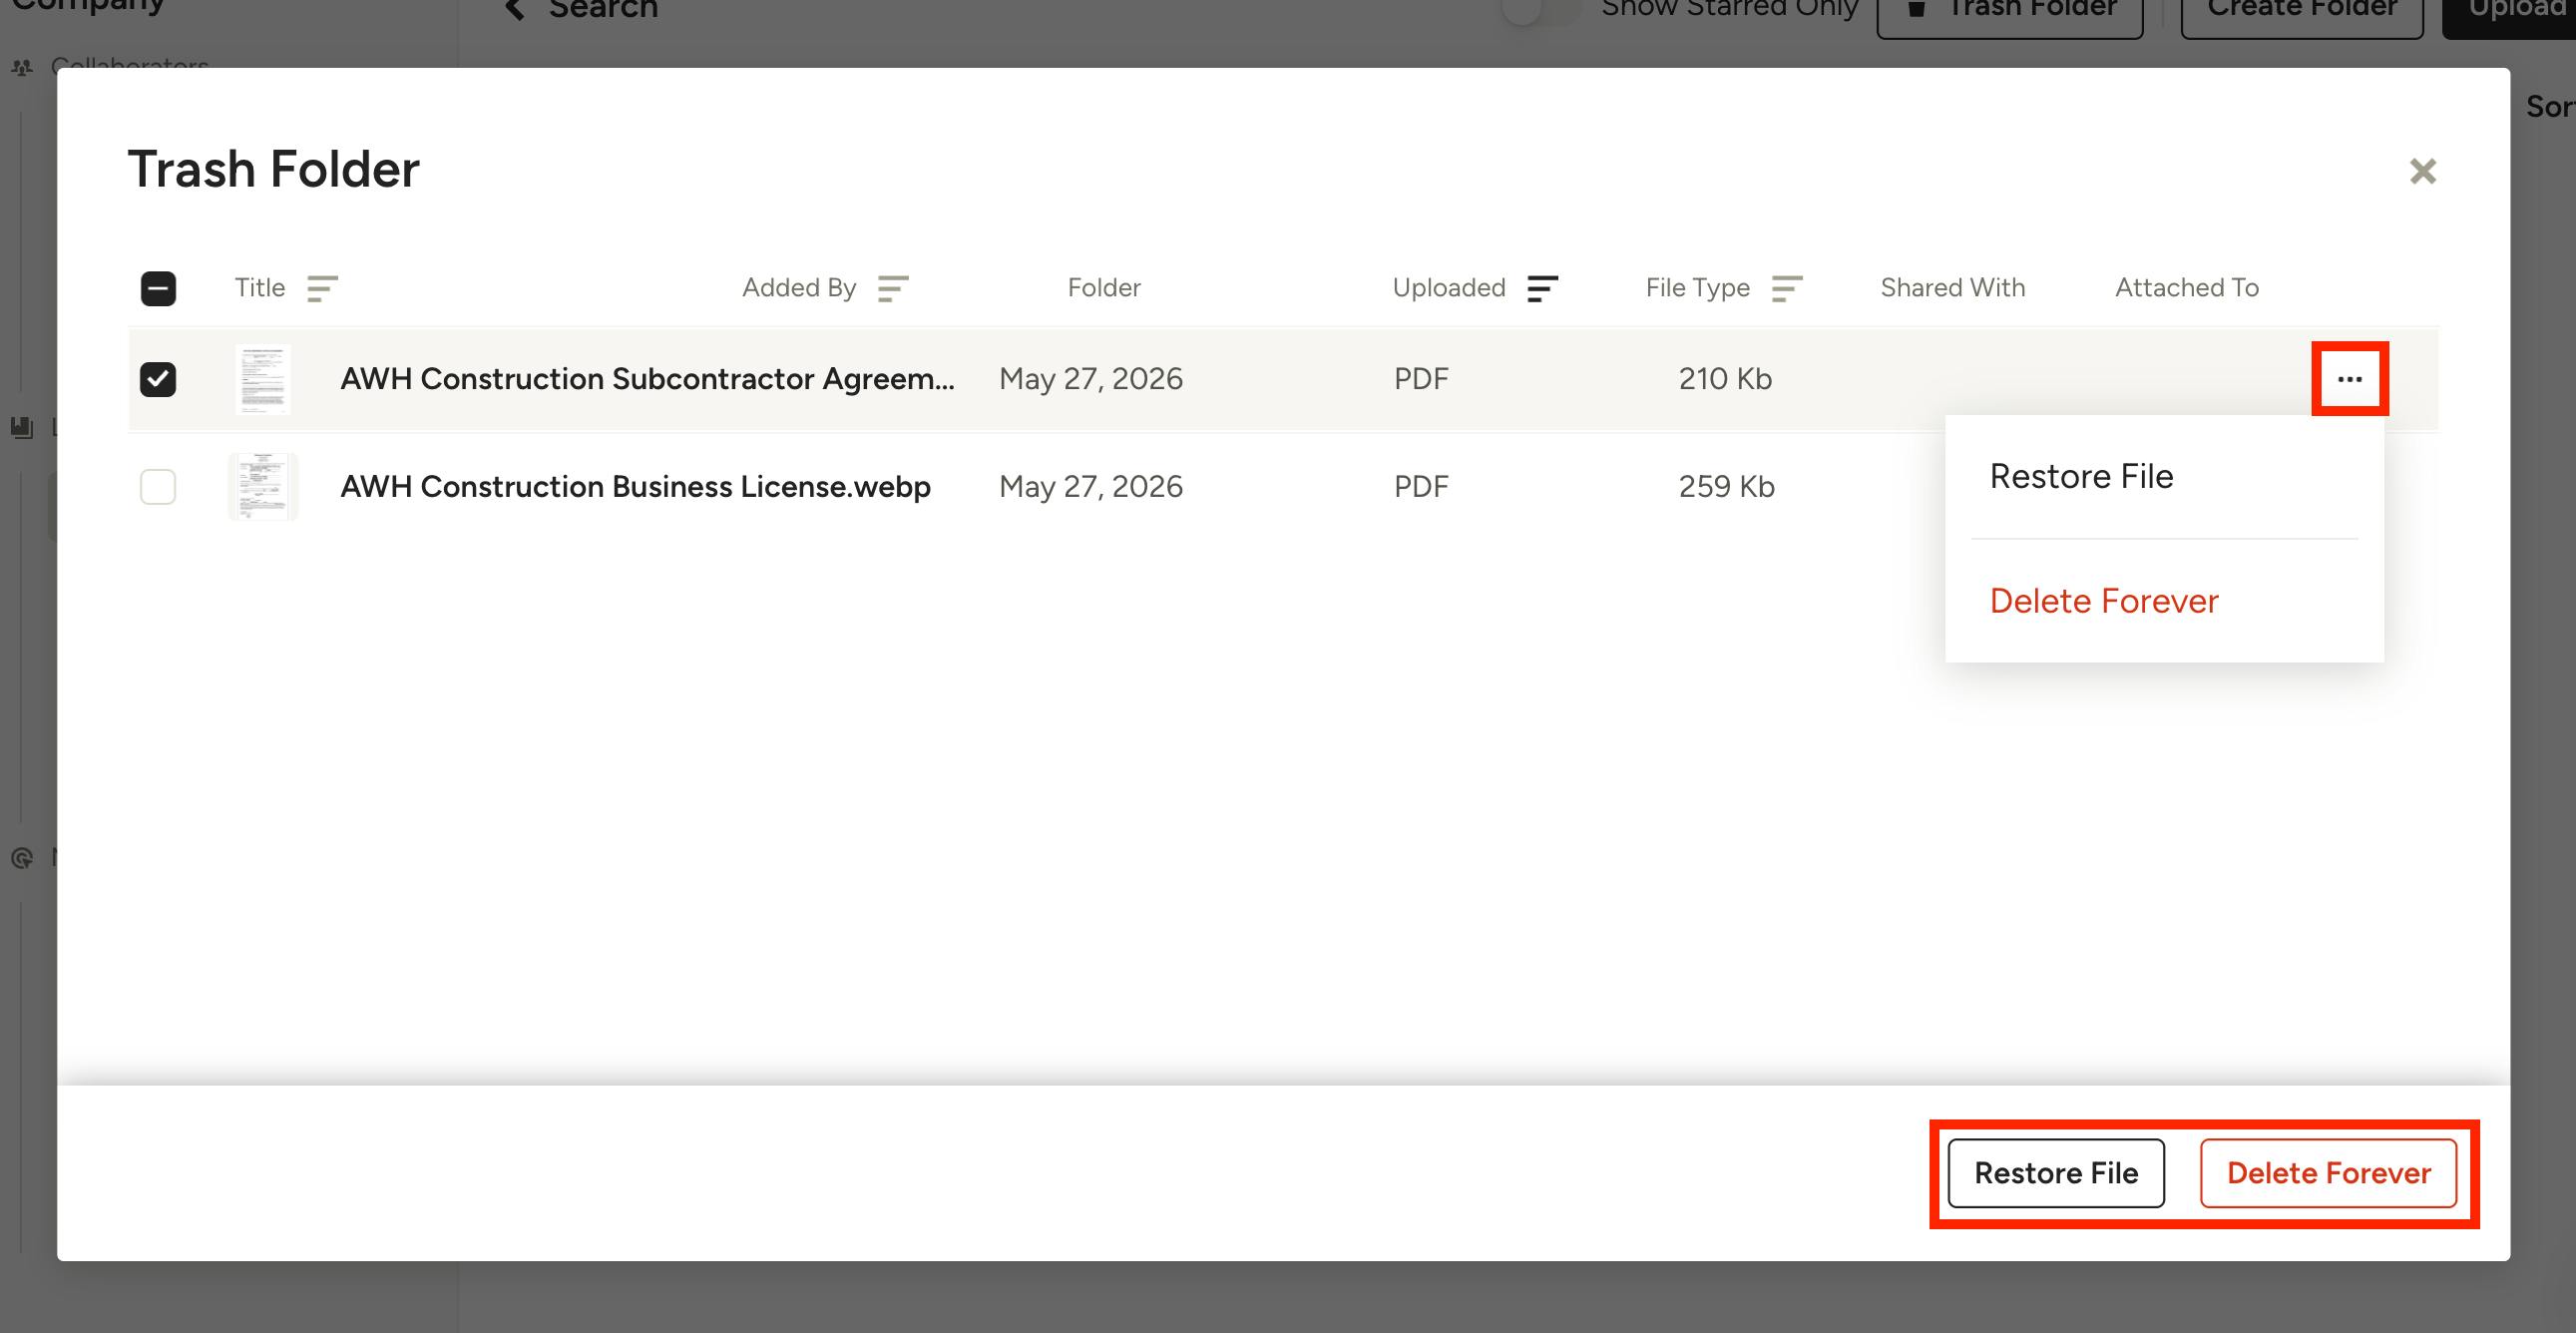
By hovering on a deleted file, you’ll see the three dots icon where you can access more actions, such as restoring the file or deleting it forever. You can also select multiple files by using the checkbox to the left of each one, then restore or delete them in bulk by using the buttons at the bottom.